Create Discs
Using the Xbox Developer Portal, you can request that physical discs be made for your game or bundle.
The process is nearly identical for both games and bundles, however there are some differences which we will point out.
To create a disc request
- Navigate to your product’s overview page and select Create Discs from the left navigation menu (or under the Marketplace section).
- On the Build Discs page (or Build Bundle Discs if your product is a bundle), you will see a list of your Submitted Disc Requests, as well as a list of your Draft Disc Requests if your product is a bundle. There is also a button labeled Create Request for Rest of World (and if China is one of your sales regions, you will also see a button labeled Create Request for China). Select one of these buttons to start a new request.
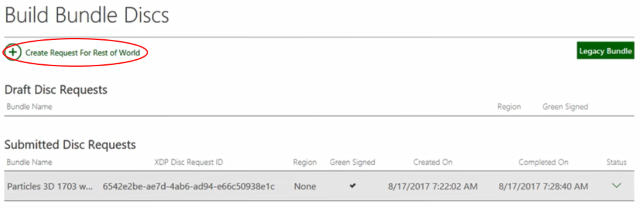
- Here, the process for creating build disc requests diverges a bit depending on if your product is a game or a bundle.
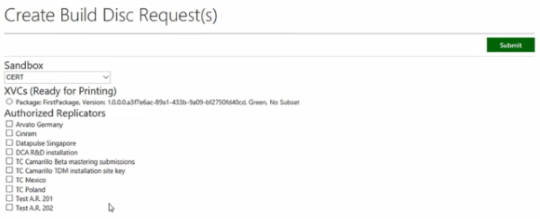
- If your product is a game, on the Create Build Disc Request(s) page,
- Select the Sandbox that the published product is in.
-
Under XVCs (Ready for Printing), you will see a list of published packages and their names, version numbers, signing modes, and subsets (if they use intelligent delivery). Select the package that you want to include on this disc.
 Note No Subset means that no subset is specified-that is, all chunks in the package are selected.
 - Select the Authorized Replicators that you want to print the discs. This is not required for submission-you can add replicators and then resubmit the UTFs later.
- Select Submit.
- Select the Sandbox that the published product is in.
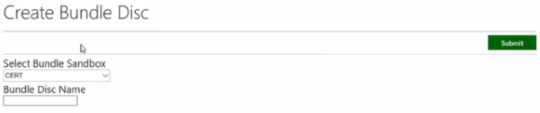
- If your product is a bundle, on the Create Bundle Disc page,
- Under Select Bundle Sandbox, select the sandbox in which the packages that you want to include on the disc are published.
- Under Bundle Disc Name, enter the name for this request.
- Select Submit.
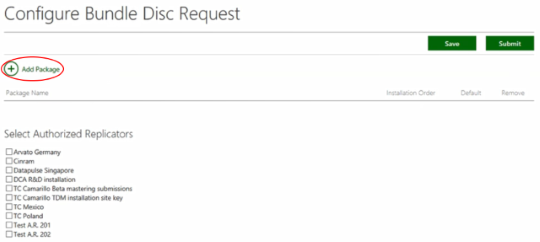
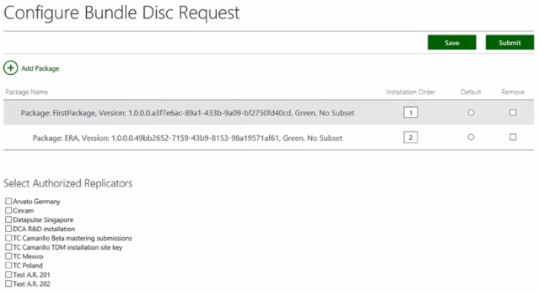
- On the Configure Bundle Disc Request page, select Add Package to add packages to be burned to the disc.
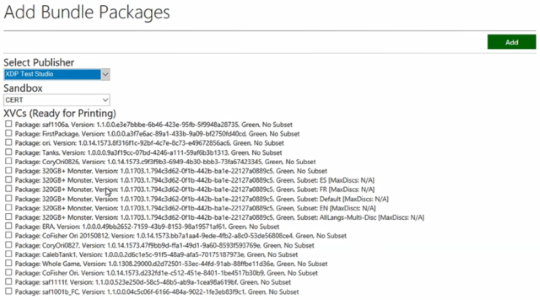
- On the Add Bundle Packages page, under Select Publisher, select the publisher of the packages that you want to include.
- Under Sandbox, select the sandbox in which the packages that you want to include are published.
-
Under XVCs (Ready for Printing), you will see a list of published packages and their names, version numbers, signing modes, and subsets (if they use intelligent delivery). Select the packages that you want to include on this disc.
Note You’ll only see packages with the same signing mode as the bundle. That is, you can only add red-signed packages to a bundle that’s published to the CERT.DEBUG sandbox, and green-signed packages to a bundle that’s published to the CERT sandbox.Note No Subset means that no subset is specified-that is, all chunks in the package are selected. - Select Add.
-
Back on the Configure Bundle Disc Request page, you will see the packages that you added listed in a table. You can specify the Installation Order and which package is the Default (which package is run), as well as Remove packages.
Note A bundle requires at least two packages. - Under Select Authorized Replicators, select which replicators you want to print the discs. This is not required for submission-you can add replicators and then resubmit the UTFs later.
- When you’re finished, select Save.
- Back on the Build Bundle Discs page, you will see your request listed under Draft Disc Requests. You can select Edit to go back to the Configure Bundle Disc Request page for the request and continue editing it. You can also select Delete to delete the request.
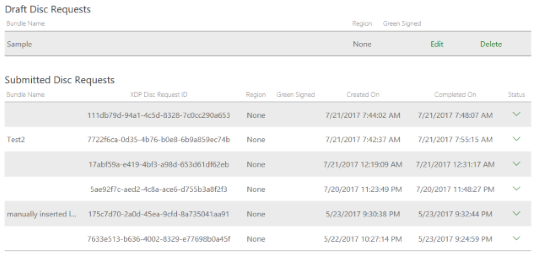
Note Only the person who created the request can delete it. - When you’re ready to submit the request, go to the Configure Bundle Disc Request page for the request by selecting Edit, and click Submit.
- Back on the Build Bundle Discs page, you will see that the draft request has been deleted, and the status of the submission is displayed under Submitted Disc Requests.
- Under Select Bundle Sandbox, select the sandbox in which the packages that you want to include on the disc are published.
- If your product is a game, on the Create Build Disc Request(s) page,
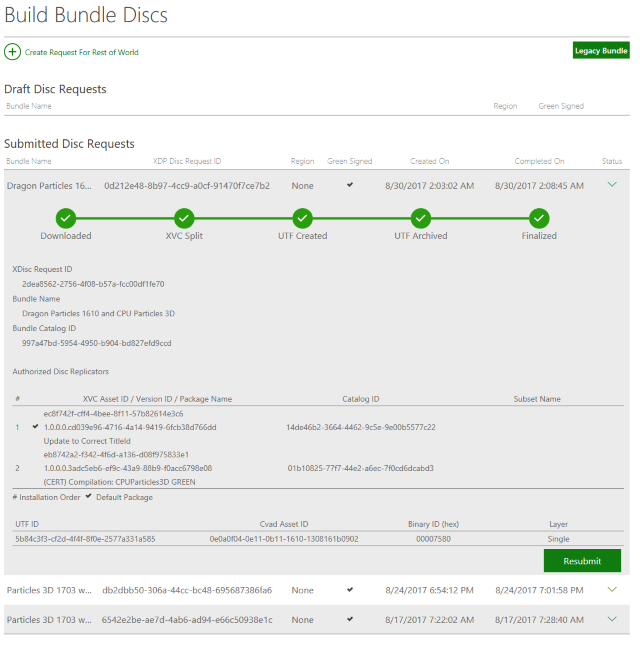
- On the Build Discs/Build Bundle Discs page, you will see the status of the submission under Submitted Disc Requests.
To resubmit a disc request
- Once a request is submitted, you will see the generated UTFs at the bottom of the submission entry on the Build (Bundle) Discs page. Select Resubmit.
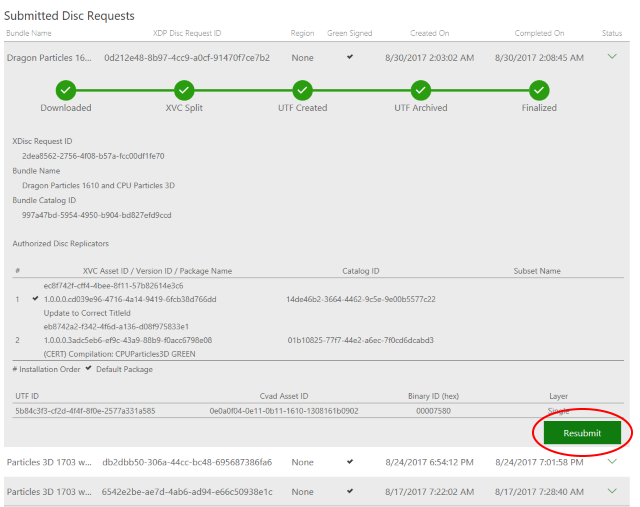
- This will take you to the Resubmit Archived Disc Utf(s) page, where you can add more Authorized Replicators and select Submit to resubmit the request.
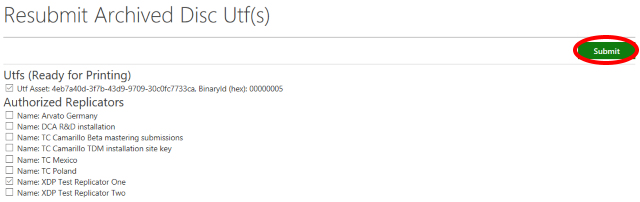
- Back on the Build (Bundle) Discs page, you will see the status of the resubmission.
To view and resubmit disc requests created with the legacy system
You may have created disc requests in the past for a product using the legacy disc request system, before this new UI was introduced. If that’s the case, you can view these previous requests (read-only) and resubmit disc requests for games (not bundles).
- If your product is a game,
- On the Build Discs page, select Legacy Disc.
- On the Build Disc Requests page, you will see a table of your disc requests submitted using the legacy system. You will also get a warning that these requests are read-only.
- To resubmit a request, select the button in the Resend column.
- On the Build Discs page, select Legacy Disc.
- If your product is a bundle,
- On the Build Bundle Discs page, select Legacy Bundle.
- On the Bundle Requests page, you will see a table of your disc requests submitted using the legacy system. You will also get a warning that these requests are read-only.
- On the Build Bundle Discs page, select Legacy Bundle.