How to: Enable Multiple Build Configurations in a Single Deployment
Xbox One projects can be set up to allow executables built with different configurations (for example, debug and release) to deploy to and run in the same directory on the Xbox One console.
To enable multiple build configurations in a single deployment
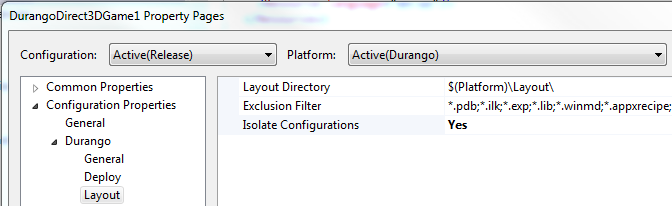
- Set the Isolate Configuration property to Yes in the project’s properties page.
- Give a unique name to each configuration.
By default the value of the Target Name property for each configuration is $(ProjectName). Change the Target Name of each configuration to $(ProjectName)$(Configuration).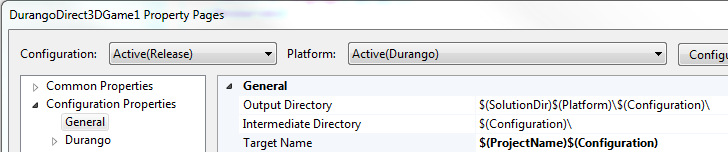
- Add application elements that correspond to each of the configurations in the project to Package.appxmanifest, the default manifest file.
For example a project with an entry for the release configuration and the debug configuration would have an <Applications> section in Package.appxmanifest that looks something like the following example.
<Application Id="App" Executable="MultiAppId1Release.exe" EntryPoint="MultiAppId1.App"> <VisualElements DisplayName="MultiAppId1" Logo="Logo.png" SmallLogo="SmallLogo.png" Description="MultiAppId1" ForegroundText="light" BackgroundColor="#6495ED"> <SplashScreen Image="SplashScreen.png" /> </VisualElements> </Application> <Application Id="AppDebug" Executable="MultiAppId1Debug.exe" EntryPoint="MultiAppId1.App"> <VisualElements DisplayName="MultiAppId1Debug" Logo="LogoD.png" SmallLogo="SmallLogoD.png" Description="MultiAppId1" ForegroundText="light" BackgroundColor="#6495ED"> <SplashScreen Image="SplashScreen.png" /> </VisualElements> </Application> Note You can specify different visual elements if you want the configurations to appear differently in the launcher.
 - Add the
<Extensions>node to the manifest if your project contains a reference to a WinRT project and you’d like to deploy multiple configurations of the WinRT project.
The following example shows<Extensions>configured for two WinRT projects.
  <Extensions>
    <Extension Category="windows.activatableClass.inProcessServer">
      <InProcessServer>
        <Path>WindowsRuntimeComponent1Release.dll</Path>
        <ActivatableClass ActivatableClassId="WindowsRuntimeComponent1.WinRTComponent" ThreadingModel="both" />
      </InProcessServer>
    </Extension>
    <Extension Category="windows.activatableClass.inProcessServer">
      <InProcessServer>
        <Path>WindowsRuntimeComponent1Debug.dll</Path>
        <ActivatableClass ActivatableClassId="WindowsRuntimeComponent1.WinRTComponent" ThreadingModel="both" />
      </InProcessServer>
    </Extension>
  </Extensions>
Deploying Multiple Build Configurations
Once multiple build configurations have been configured, as described in this topic, the configurations can be deployed by using the following tools:
Visual Studio
Configurations can be deployed by pressing Ctrl-F5 or F5. All configurations will be deployed to the console; the currently selected configuration will be the configuration that is launched.
xbApp
Running xbapp deploy directory-path on a Layout directory that contains multiple configurations will deploy all of the configurations and return multiple application user model IDs (AUMIDs). The desired configuration can then be launched by passing its AUMID to xbapp launch.
For syntax and more information about xbApp commands, see Application Management (xbapp.exe).