Configuring Pairwise ID for a Web Service
To configure pairwise identification for a web service, you need to complete the following tasks, which this topic describes in detail:
- Create a Microsoft account for your organization.
- Enable your application for Microsoft accounts.
- Configure API settings.
- Set values for domain redirection.
- Add the Microsoft account for your organization as an administrator for your publisher in XDP.
- Configure domain redirection.
- Configure your application.
Note
Only the final task, configuring your application, must be repeated for each product. The other tasks are required once for each publisher.
Create a Microsoft account for your organization
If you do not already have a Microsoft account created specifically for your organization for use with Xbox Developer Portal (XDP), you need to create one. This account will manage the identity of your apps and titles. It will also be used in configuring settings that make user and device identifiers anonymous.
You can create a Microsoft account on https://signup.live.com/.
Enable your application for Microsoft accounts
You must enable use of Microsoft accounts with your application.
The name that you specify in the following procedure for your application is not tied to a specific title. Instead, it is a placeholder that will contain configuration data that identifies your publisher. The maximum length of this name is 129 characters.
To enable use of Microsoft accounts with your application
- In Internet Explorer, begin an InPrivate browsing session.
You can activate InPrivate browsing by pressing Ctrl+Shift+P. - In the InPrivate browsing session, open the following link to Microsoft account Developer Center: http://go.microsoft.com/fwlink/p/?LinkId=193157
- Sign in with the Microsoft account for your organization.
If you do not have a Microsoft account dedicated to this use with XDP, return to the previous step, Create a Microsoft account for your organization. - Click Create application.
If you have not yet created an application, Microsoft account Developer Center automatically displays the interface for creating an application.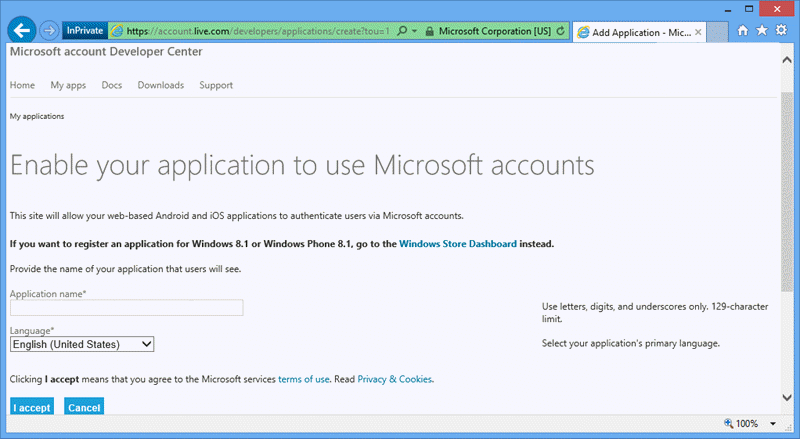
- For Application name, type a name for your application.
We recommend a name of the following form: publisher-name_XBL_anonymization.
Configure API settings
After you have created an application, you configure the API settings. If you have just finished creating an application, as described in the preceding section, you can configure API settings by using the following procedure.
If you want to modify the API settings for an existing application, log in to Microsoft account Developer Center at http://go.microsoft.com/fwlink/p/?LinkId=193157, click the name of the application that you want to configure, and then click Edit settings.
To configure the API settings
- Click API Settings.
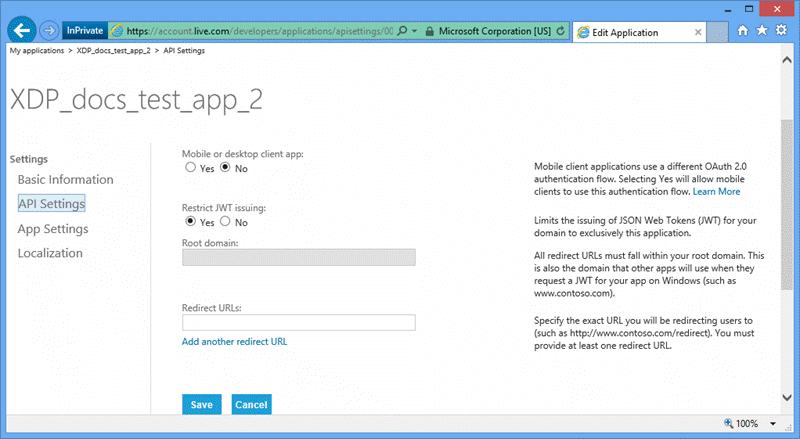
- For Mobile or desktop client app, select No.
- For Restrict JWT issuing, select No.
- For Redirect URLs, enter your URL.
- Click Save.
Set values for domain redirection
In XDP, configure the exact string that you specified for the application in the previous step.
Do not use an existing XDP user account to configure the redirection domain.
Add the Microsoft account for your organization as an administrator for your publisher in XDP
To configure the Microsoft account for your publisher
- Sign in to Xbox Developer Portal (XDP) as a user who has administrative permission for your publisher.
- In the menu bar at the top of the page, click Manage, and then click Access Management from the drop-down menu.
- Click the Administrators group for your publisher.
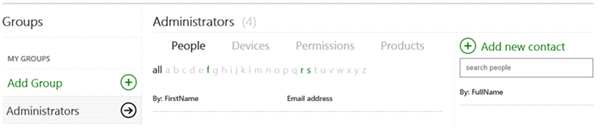
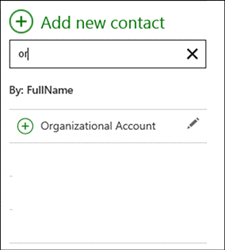
- On the right side of the page, click Add new contact.
If you cannot see Add new contact, scroll sideways or adjust the zoom level of your browser.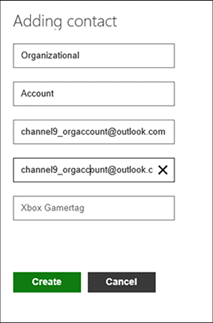
- Enter the details of the Microsoft account that you created in Create a Microsoft account for your organization, and then click Create.
The new contact will appear in the list on the right side of the page. - Verify that the Administators group is still selected on the left side of the page, and then click the plus sign (+) next to the name of the new contact to add it to the Administrators group.
- Sign out of XDP.
Configure domain redirection
To configure domain redirection
- Sign in to XDP using your Microsoft account, and access your publisher’s product group.
- In the menu bar at the top of the page, click Manage, and then click Web Services from the drop-down menu.
- Under Business Partner Configuration, click the small green check marked tile.
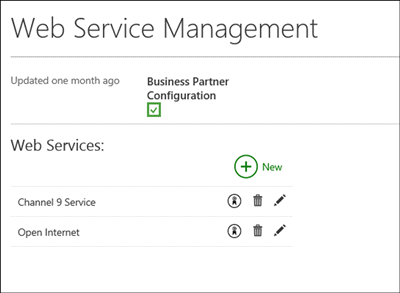
- On the Business Partner page, type or paste the exact URL of the redirection domain for MSA Subtarget.
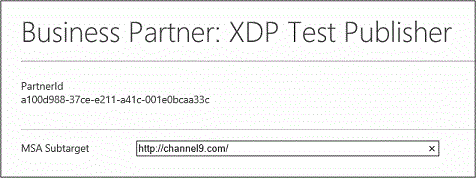 This URL should be the same as the URL that is specified in API Settings on Microsoft account Developer Center, as described in Configure API settings.
 - Click Save.
- On Web Service Management, click Publish.
Configure your application
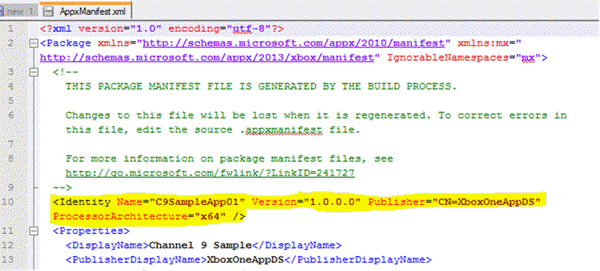
The manifest for your title, AppxManifest.xml, should have been created by Visual Studio when the project was created. In the Solution Explorer in Visual Studio, locate Package.appxmanifest, right-click it, and select View Code to view its XML code. There should be an Identity section that contains Name and Publisher attributes. Copy the values for Name and Publisher and have them ready for the following procedure.
Figure 1. Example of Identity in AppxManifest.xml.
To configure your application
- In XDP, navigate to the product that you want to configure.
- Click Product Setup from the left-hand navigation menu, or under Product Configuration.
- Click on Application ID Setup from the resulting menu. XDP displays details like those in the following figure:
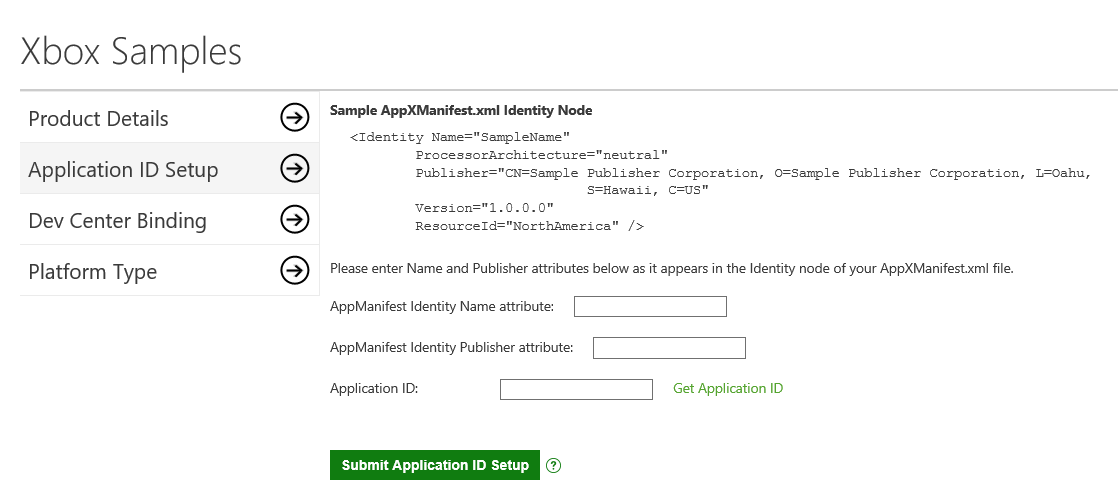
- For AppManifest Identity Publisher attribute, type or paste the value of Publisher from the Identity section of the manifest.
- Click Get Application ID next to the Application ID field.
After processing, XDP updates the display to include an application ID.