Retail Disc Royalty Tier Setup
You can now configure your retail product’s Royalty Tiers through the Xbox Developer Portal (XDP) UI.
Note There are a few exceptions where you cannot use XDP to configure Royalty Tiers, including Sub-Publishing, publishing in China, and publishing Compilations; please contact your Account Manager for more information.
You must have the Manage Products or Royalty Config Setup permission to access Retail Disc Royalty Tier Setup for your product. Your XDP Administrator has access to Retail Disc Royalty Tier Setup for all your products, and can set up access for other members of staff on a per-product basis by adding them to a group configured with one of the aforementioned permissions.
Retail Disc Royalty Tier Setup only applies to products that are intended for both physical and digital media. You can edit what your product is intended for on its Product Setup page. Click Product Details, and under What is this product intended for? select Physical and digital media.
In this section
Set up Royalty Tiers
To set up Royalty Tiers for your product:
- Navigate to your product, either by selecting it from your product group’s list of products or by searching for it in the search box on the top-right.
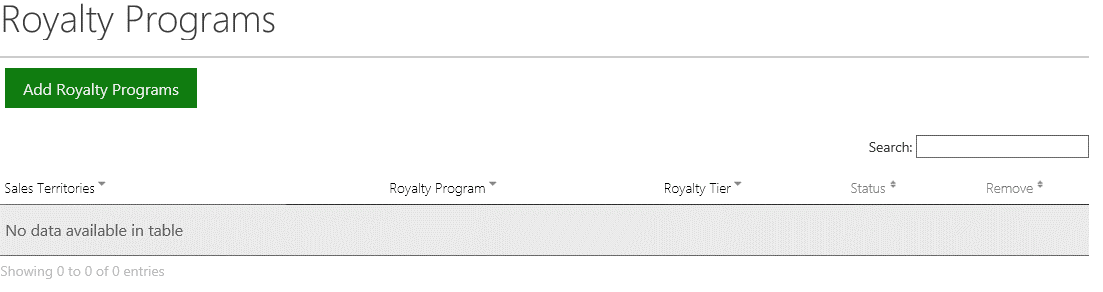
- Navigate to the Royalty Programs page by clicking Retail Disc Royalty Tier Setup from either the navigation menu on the left or under the heading labeled Product Configuration. If you have never added a Royalty Program to your product, you should see something similar to the image below.
- Navigate to the Choose Royalty Program and Tier page by clicking Add Royalty Programs on the Royalty Programs page.
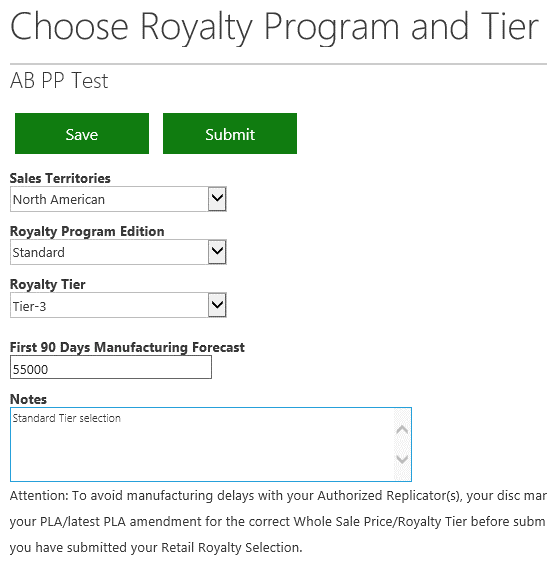
Note In the following steps, please refer to your Publisher License Agreement (PLA) and any amendments for the correct information to enter. If you are ever in doubt about what to enter, contact your Account Manager. - From the Sales Territories drop-down list, select a Sales Territory. (You will only see the Sales Territories that you have already configured in Sales Region Setup.) For more information, see Configure the Sales Regions for a Product.) After you select a Sales Territory, several more fields will be displayed.
- Under Royalty Program Edition, select an edition. For anything other than Standard, see Non-Standard Royalty Tiers below.
- Once you select a Royalty Program edition, the Royalty Tier drop-down will appear. Select the required Royalty Tier.
- Under First 90 Days Manufacturing Forecast, enter how many discs are expected to be manufactured in the first 90 days.
- Under Notes, enter the Whole Sale Price (Suggested Retail Price-Japan only) and any notes for your Account Manager, such as notes about Migration or the contents/bills of materials (BOMs) of Non-Standard editions.
- When the form is completed and ready for submission, it will look similar to the image below.
- If you completed your form, click Submit to submit it. You can also save your form for completion later by clicking Save.
You will be returned to the Royalty Programs page where you can see a table of the Royalty Programs that you have configured. If you have only saved a Royalty Program, it will say Draft in the column labeled Status. Once you submit the Royalty Program, this will change to Submitted.
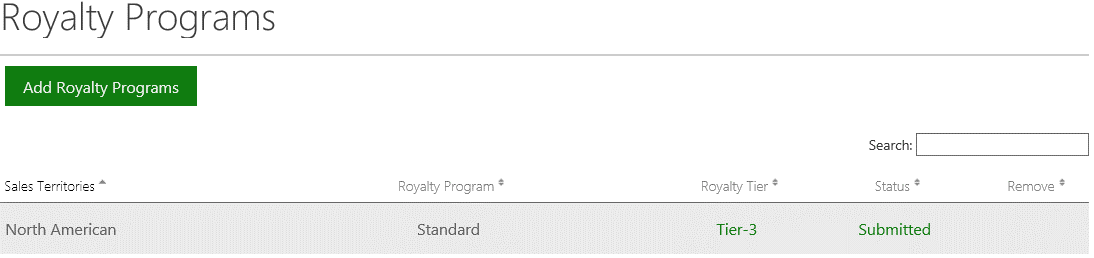
You can continue editing a draft of a Royalty Program by clicking its Tier in the Royalty Tier column. However, you will not be able to edit the Sales Territory or the Royalty Program edition.
To remove a Royalty Program, click the “[x]” in the Royalty Program’s Remove column. You can only do this for drafts.
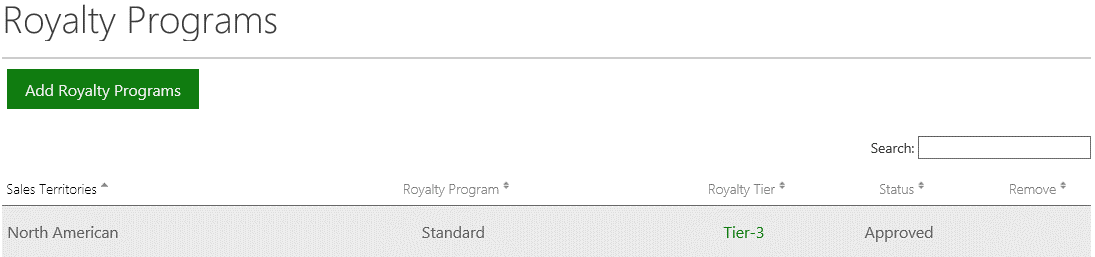
After you have submitted a Royalty Program, copy the URL from the Royalty Programs screen and paste it in an email to your Account Manager. One email will suffice for multiple submissions. After your Account Manager has reviewed the form, it will be either approved or rejected. If it is approved, its status will change to Approved. If it is rejected, see Tier Rejections and Resubmissions below.
Non-Standard Royalty Tiers
If you are submitting a Non-Standard Royalty Program edition, you need prior approval from your Account Manager. You should also ensure that the Notes section details the contents and BOMs of the edition. For example, a Non-Standard Limited Edition at Tier 3 may have 2 SKUs: a Tailspin Toys SKU with a free map, and a Wingtip Toys SKU with an extra character, all of which should be detailed under Notes.
The Hits Royalty Program edition is only applicable to publishers that have signed PLA Amendment #3. Please refer to that amendment or speak to your Account Manager for more information.
The Review Disc Royalty Program edition (European sales territories only) is royalty-free, so no tiers can be selected. XDP will display an additional option to allow Microsoft to share sample review discs with its affiliates for potential additional marketing activity, which you can check to allow or leave unchecked to disallow. You can order a maximum of 3,000 Review Discs-make sure to enter no more than this quantity in the First 90 Days Manufacturing Forecast field.
Tier Rejections and Resubmissions
If your Account Manager rejects a Royalty Program, you will need to resubmit it.
To view the reason for rejection:
- In the Royalty Tier column, click the Tier for the Royalty Program.
- Open the Last Approval/Rejection Details section.
- Review the text in the Approver Notes to view the reason for rejection.
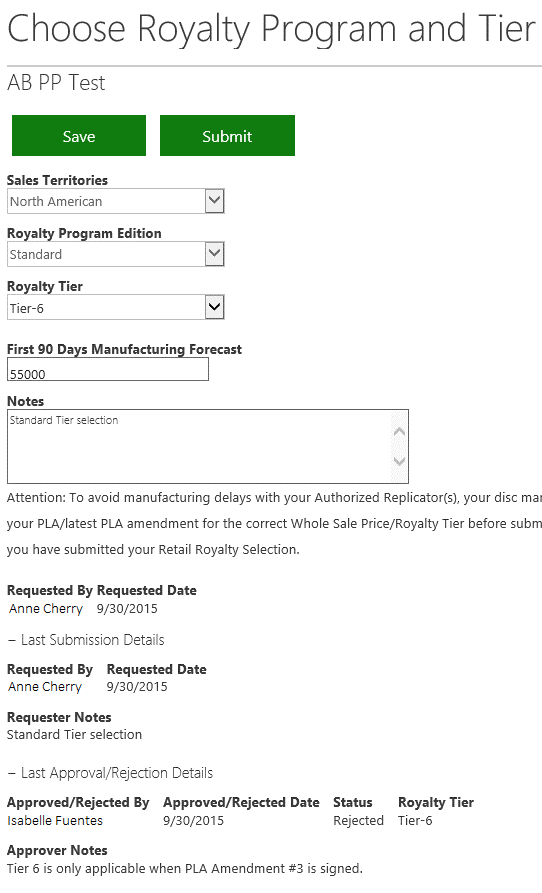
In the example below, the submission was rejected because Tier 6 isn’t allowed if Amendment #3 has not been executed. Make the appropriate adjustments, resubmit your form, and email your Account Manager so they can promptly review the submission.
Migrating Tiers
Ensure that you understand the Tier Migration criteria before submitting a request-refer to your PLA and Amendments or speak to your Account Manager for details. To Migrate the Tier for a product:
- In the Royalty Tier column, select the previously approved Tier entry.
- Under Royalty Tier, select a new Tier from the drop-down menu.
- In the Notes field, enter “Migration Tier [Previous Tier] to Tier [New Tier]” and enter the date the product released at the current Tier.
- Click Submit.
- Email your Account Manager so that they can promptly review the submission.