Configure Xbox Live events for data platform 2013 in Windows Dev Center
Note: This topic describes the features available only with proper permissions. For details, talk to your account manager or another contact at Microsoft.
This topic describes the procedures for adding and changing events in the Dev Center service configuration for a title. If a title is using data platform 2013, events are the key data sent by the title to the Xbox Live service to update stats and leaderboards and to unlock achievements.
For an intro to the Xbox Live service configuration, see Xbox Live service configuration. For an intro to data platform 2013, see How the Xbox Live data platform 2013 works.
Sections in this topic:
- What is an event?
- Create an event
- Configure an event
- Change an event
- Copy an event
- Delete an event
- Download the Events Manifest file
What is an event?
An event is anything that happens during play and can be captured. A player acquiring a weapon is an event, and so is defeating an enemy by using that weapon.
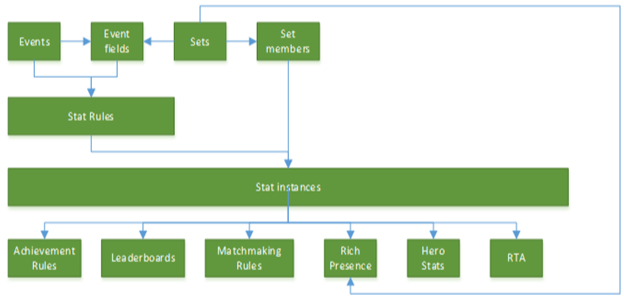
An event consists of the event name, an event description, and a number of fields that contain event-related data. When a title writes an event, the event is stored on the local device until it can be sent up to the Xbox Live service. The Xbox Live service receives the event and uses it to build and update stats, leaderboards, achievements, and other features of data platform 2013 according to the rules you define in the service configuration. For details, see Game events.
Configure an event
-
Sign in with your account on Dev Center.
-
Select your title, and go to Services > Xbox Live.
-
Click the link to Stat rules.
-
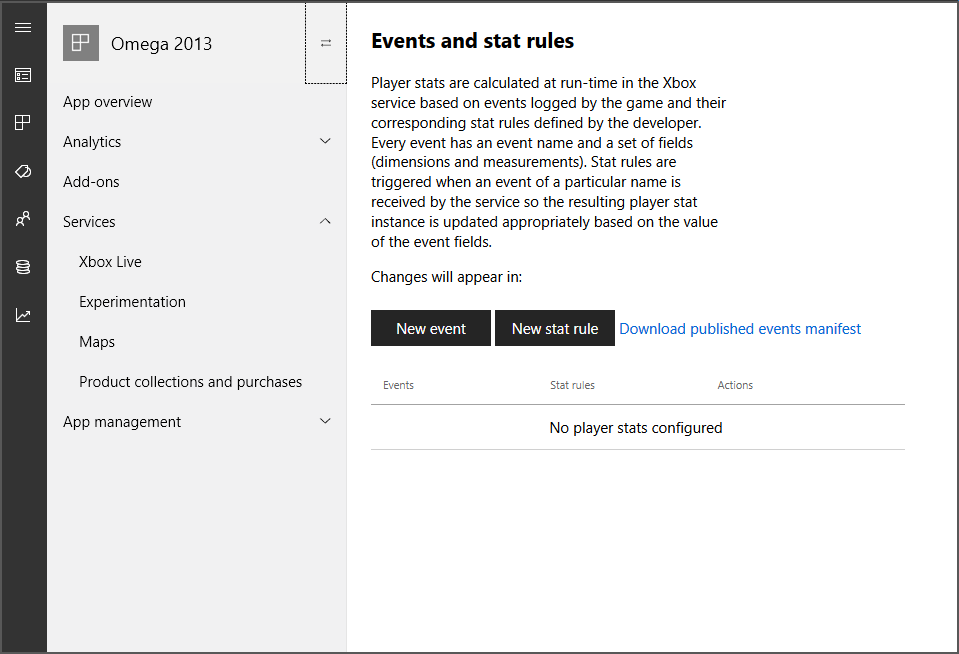
On the Events and stat rules page, configure the events and the stat rules according to the events.
Create an event
-
On the Events and stat rules page, click New event.
-
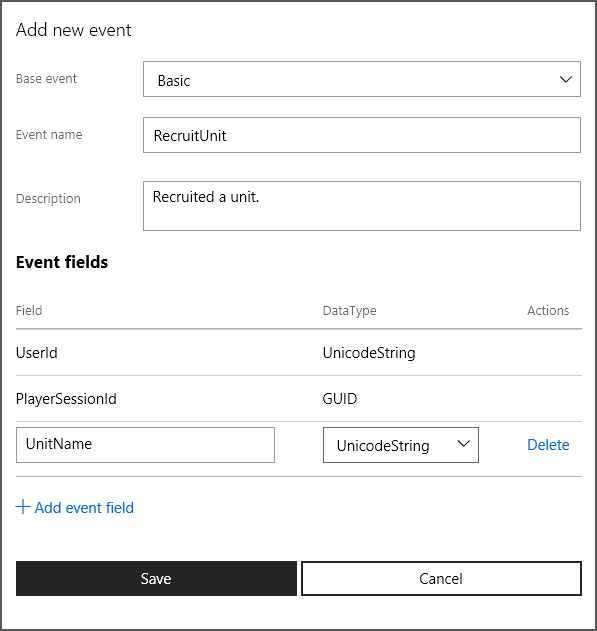
In the dialog box, specify the values for the following fields:
-
Base event
From the drop-down list, select the base event on which you want to build your new event. The selected base event will control the default fields with which your new event will be prepopulated. You can add any other fields but can’t remove the default ones. - Event name
- Provide a name that characterizes the event and that you’ll easily remember and recognize.
- The event name doesn’t have to match the name of the base event selected for the new event.
- Event names aren’t displayed to the gamer and are internal to the code and game studio.
- Event names must be unique within a provider namespace: a single provider can’t have two conflicting event names.
-
Description
Provide a brief description of the event. This text is optional and hidden from the gamer. - Event fields
- The fields in this list represent the data that will be captured in connection with the new event.
- To add an event field, click Add Event Field and specify the Field name and DataType.
-
There are character limits on the different types of fields:
- Achievement name: 44
- Locked description: 100
- Unlocked description: 100
- Achievement rule name: 44
- In-app reward name: 57
- In-app reward description: 90
- Art reward name: 57
- Art reward description: 90
- Rich presence: 44
- Hero stat name: 44
-
-
Click Save to create the event and close the dialog box.
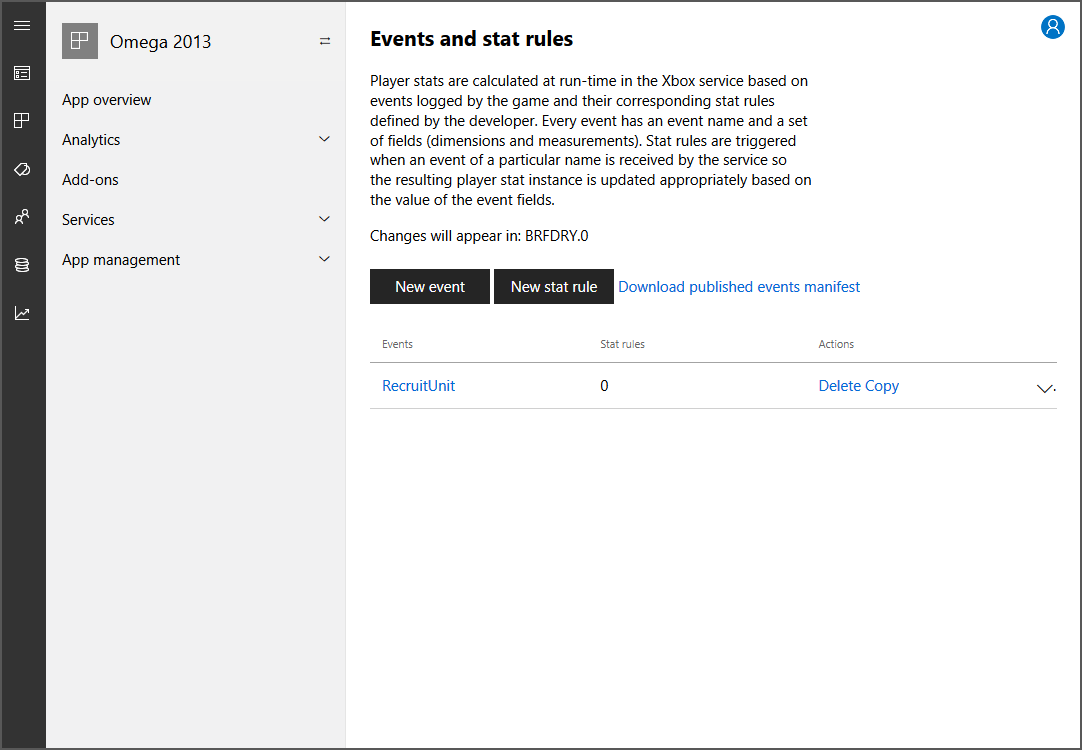
Your new event is now listed on the Events and stat rules page:
Change an event
Important:
After a title passes Final Certification, existing events in that title can no longer be changed except to add new event fields.
It’s possible to delete custom event fields but not the default event fields provided automatically when the event was created.
-
On the Events and stat rules page, under Events, click the name of the event you want to change.
-
Make the changes in the Update event dialog box.
-
Click Save.
Copy an event
You can create a new event by copying an existing event and modifying its info for the new event.
-
On the Events and stat rules page, under Events, click Copy for the event you want to copy.
-
Provide the Event name for your new event.
-
Update the description, and add or remove the event fields as needed.
-
Click Save to create the event and close the dialog box.
Delete an event
After a title passes Final Certification, existing events in that title can no longer be deleted.
Deleting an event deletes any chained dependencies it might have. Before deleting an event, be sure that you also want to delete all of its dependencies.
You can delete events while your game is in development but not after it has exited Final Certification—that is, after you’ve launched your product.
-
On the Events and stat rules page, under Events, click Delete for the event you want to delete.
-
In the Confirmation dialog box, click Delete or Cancel.
Download the Events Manifest file
After you finish defining and changing your title’s events, you must publish them to Xbox Live and download the Events Manifest file, which you need in order to develop your title.
For info on downloading the Events Manifest file, see Downloading the Events Manifest file.