Profile Guided Optimization for Xbox One Titles
This document describes how to use Profile Guided Optimization (PGO) for games deployed and running on Xbox One. PGO is a runtime compiler optimization technology that leverages profiling data collected while running important or performance centric user scenarios to build an optimized version of the title.
PGO optimizations have significant advantages over traditional static optimizations as they are based on how the title is likely to perform in a production environment. The optimizer will favor speed for code paths corresponding to common user scenarios and will favor size for uncommon user scenarios, resulting in faster code for common scenarios and smaller code for less frequently used scenarios.
For more information on PGO refer to the PGO blog.
The performance gains you’ll see with PGO will vary by title, but it’s common to expect gains in the 5-30% range. Please note that PGO does not address any GPU centric performance parts of the application.
Using PGO with the Direct3dGame Template
Prerequisites
Before you begin, you’ll need to install the April 2014 XDK (or any newer version) from GNDP.
Configuring your Project for PGO
- Start an Xbox One XDK command prompt from the start menu and connect to your console using xbconnect or Xbox One Manager.
Figure 1. Using xbconnect to connect to your console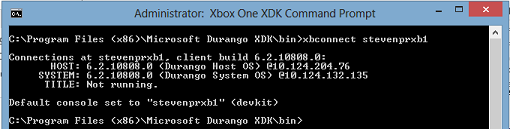 Figure 2. Using Xbox One Manager to connect to your console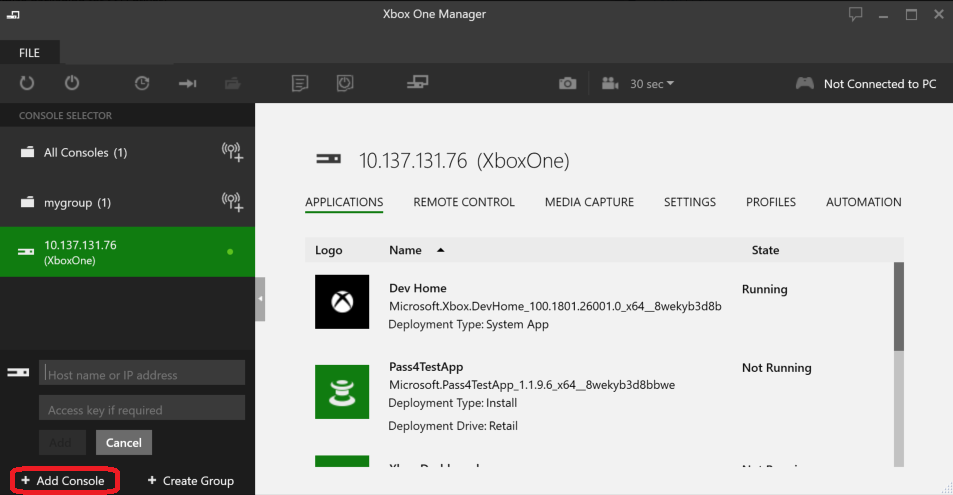
- Using Visual Studio, create a new Direct3d Game project as shown below:
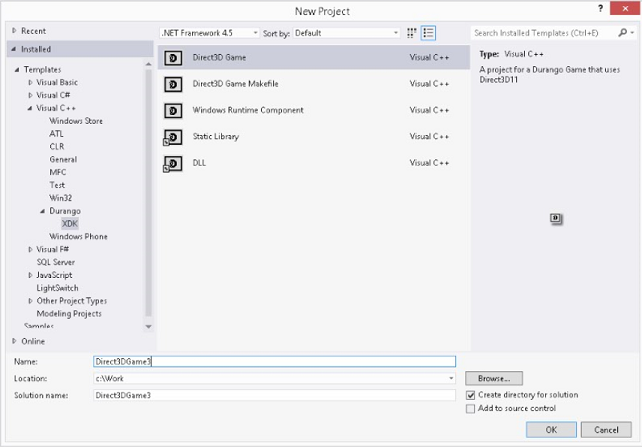
- After your project has been created, you’ll need to add two PGO binaries to your project so they get deployed with your title. To do so, right click on the project and select Add->Existing Item.
Figure 3. Add an existing item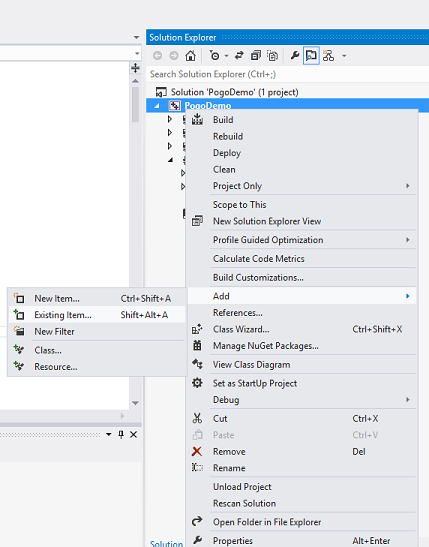
- If you’re using Visual Studio 2012, add the files pgort110.dll and pgosweep.exe to the project. These files can be found as a part of your XDK installation at the following path:
C:\Program Files (x86)\Microsoft Durango XDK\160200\Compilers\dev11.1\vc\bin\amd64\kernelx.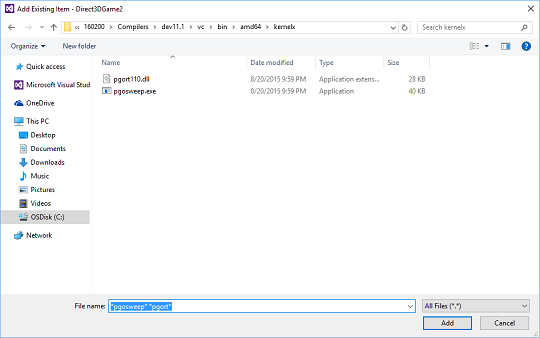 If you’re using Visual Studio 2015, add the files pgort140.dll and pgosweep.exe to the project. These files can be found as a part of your XDK installation at the following path:
 C:\Program Files (x86)\Microsoft Durango XDK\151100\xdk\VS2015\vc\bin\amd64\.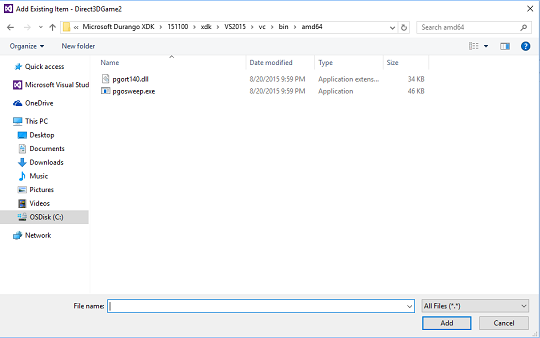
- Select the newly added PGO files and bring up their property pages and make sure the properties are set to the values shown in the figure below. Note that these settings don’t persist across build configurations, so if you change your configuration you’ll need to set these properties again.
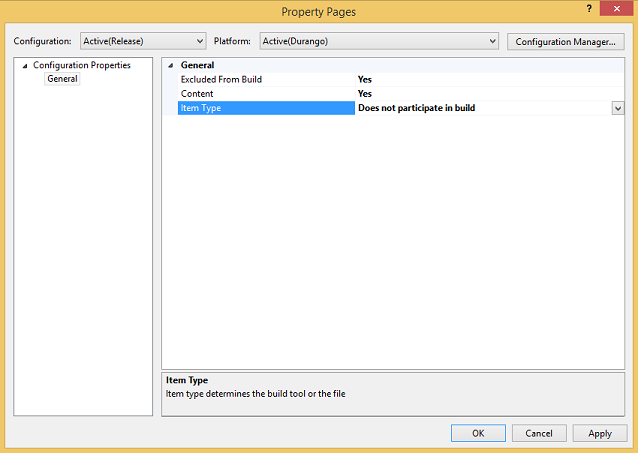
Creating a PGO Instrumented Build
Next, you’ll create an instrumented PGO build.
- Bring up your project’s property page and set Whole Program Optimization to Profile Guided Optimization – Instrument:
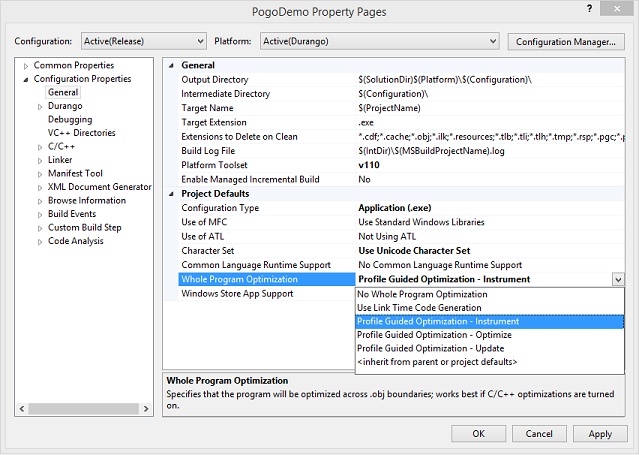
 Note Only one binary can be instrumented at any given time. Trying to instrument more than one binary will result in incorrect data or a failure to launch the title.
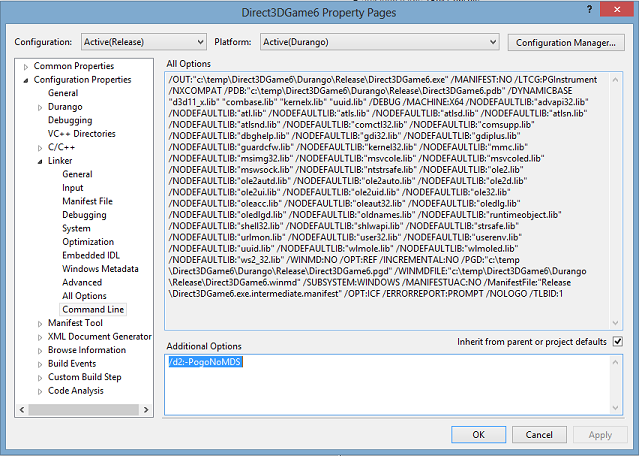
 - The overhead of PGO instrumentation can be substantial. In some cases the overhead might be so substantial that your title might have trouble running properly. If you’re seeing drastic performance issues when running your instrumented build, you can specify /d2:-PogoNoMDS on the linker command line. This option causes PGO to gather less profiling data when the instrumented build is running. The advantage of using this switch is that the instrumented build of your title will run faster. The potential downside is that PGO will have less information to use when determining what it can optimize. So in theory your final build won’t be as optimal as it might be. However, in practice we’ve seen only small differences in the end result when /d2:-PogoNoMDS is used. To use this switch, add /d2:-PogoNoMDS to the linker command line as follows:
- Before deploying your title, you’ll need to enable ProfilingMode, configure debug memory for use by PGO, and reboot your console. These steps are necessary because the PGO runtime needs to allocate memory outside of your title space.
You can make the required changes using xbConfig or Xbox One Manager.
Figure 4. Enabling ProfilingMode using xbconfig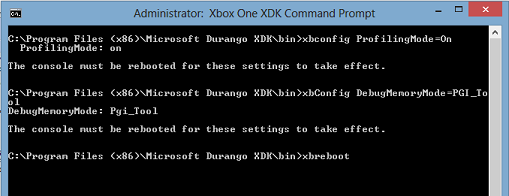 Figure 5. Enabling ProfilingMode using Xbox One Manager
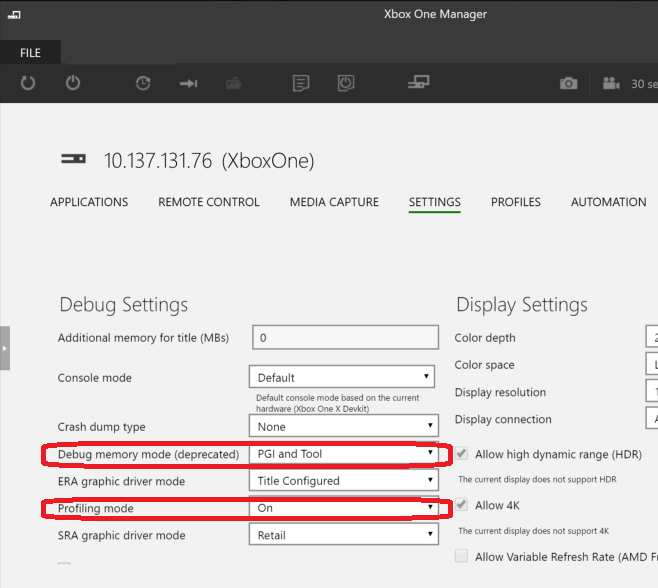 Note Even if you’ve enabled ProfilingMode with an XDK prior to the April 2014 XDK, you’ll need to do it again because the amount of debug memory reserved when ProfilingMode is On has changed in the April 2014 XDK.
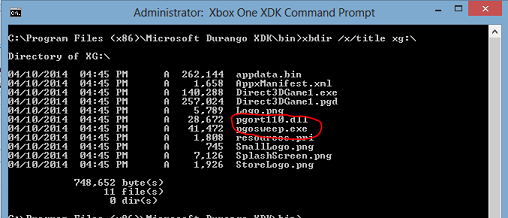
After you’re done using PGO, you’ll need to set DebugMemoryMode back to its original value in order to use PIX. If you forget, you’ll get an E_FAIL dialog when trying to do any type of GPU or CPU capture. Here’s the command:xbConfig DebugMemoryMode=Pix_Tool - Build and deploy the instrumented build to your Xbox One Console. With your title running, you should see that the PGO files have been deployed as part of your title.
Train PGO for your Title
- Training is the most important phase of PGO. The performance gains you’ll attain with PGO are a direct function of how well the application is trained. For the training phase of PGO, exercise common performance centric scenarios with your title running.
- After the common performance scenarios have been exercised, you’ll initiate collection of a PGO artifact file called a .pgc file. The pgc file captures your training data. you’ll use pgosweep.exe to generate your .pgc file as shown below:
Figure 6. Command: ‘xbrun /x/title /o g:\pgosweep.exe Direct3DGame3.exe t:\Direct3DGame3!1.pgc’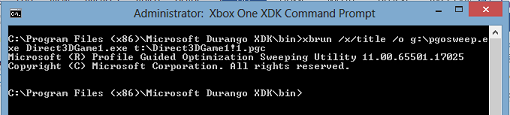 In this example, we’ve created a .pgc file called Direct3DGame1!1.pgc. When creating a .pgc file we typically use the convention titlename!#.pgc where titlename is the name of the running title and # is 1 + the number of appname!#.pgc files you’ve already created.
 - Each invocation of pgosweep.exe creates a separate .pgc file. Ideally, you’ll want to create numerous .pgc files representing different performance centric scenarios. When you’re done creating your .pgc files you’ll be able to see them in your console’s t:\ directory:
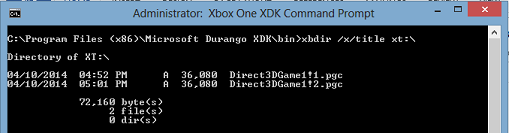
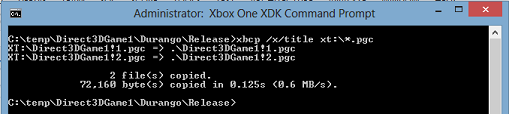
- Next, your .pgc files need to be merged into another PGO artifact known as the .pgd file. The .pgd file is used by the compiler during the last phase of PGO called the optimization phase. Before starting the optimization phase you’ll need to copy your .pgc files from your console back to your PC using xbcp. The .pgc files must be copied to your build output directory,
C:\temp\Direct3DGame1\Durango\Releasein the example below.
Note you’ll need to copy the .pcg files back from the console while your title is running, otherwise you won’t have access to t:.
Creating the Optimized Binary
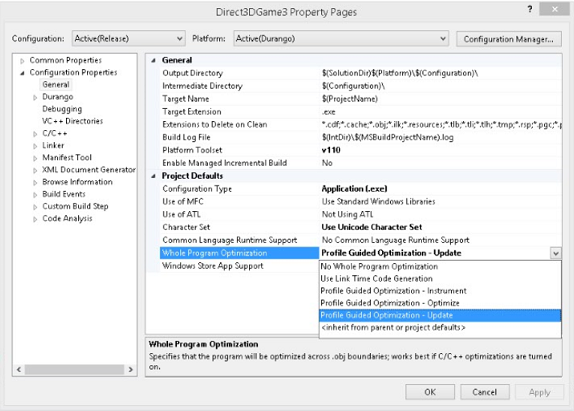
- To create your optimized build, set the Whole Program Optimization property to Profile Guided Optimization – Update as shown below:
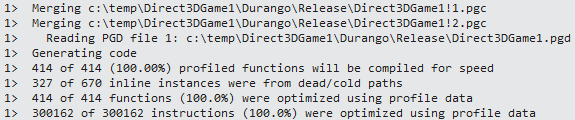
- After rebuilding your title, your build output should include some PGO-related messages like the following:
 You’re now ready to deploy your optimized binary and measure your performance gains.