Create and Manage Content Packages
This topic provides specific procedures for creating and working with content packages.
For an overview of the various design-time content containers in Xbox Developer Portal (XDP)-product groups, products, product instances, and content packages-see XDP Content: Storage and Access.
To access your content packages, follow these steps:
- In the Search For drop-down list on the top right, select Product.
- In the Search box, type the name of the product, and press Enter. Then, select the product name from the results list.
- Under Product Instances, in the row for the product instance you want to add a package to, in the Packages column, click Add/Edit. Alternatively, in the left navigation menu, click on the product instance in the bottom half of the menu to open its drop-down, and select Content Packages.
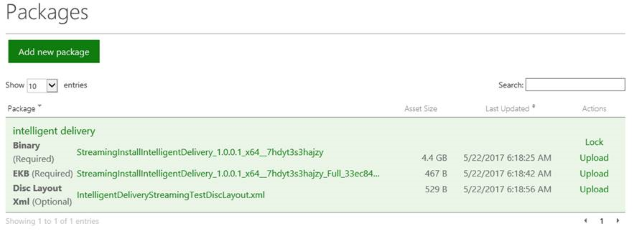
- Here you can view all of your packages in a table view with additional information, such as Asset Size and when they were Last Updated. You can sort packages by name or the date they were last updated by clicking the respective column headers.
You can also click on a package file to be taken to its Asset Details page, where you can view more information about it.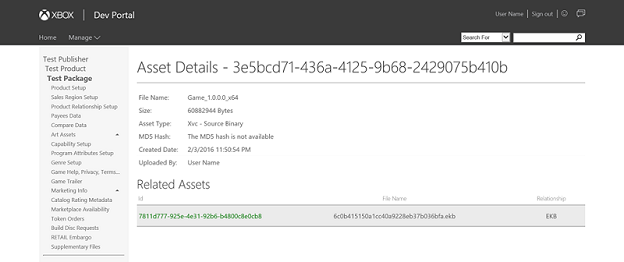
Sections in this topic:
- Create a content package
- Change the name of a content package
- Upload files to a content package
- Deactivate or reactivate a content package
- Locked content packages
Create a content package
The following guidelines are strongly recommended when creating content packages:
- Because content packages can’t be deleted, create content packages only as needed.
If your product has one binary, you need only one content package. If your product has two binaries (for example, full violence and low violence), create two content packages. - Give each content package a unique name.
Best practice recommendation: sandbox-name**product-name [- SKU-differentiators ]. For example: Microsoft.1 Halo - EMEA. - Don’t create a new content package when you want to submit a content update.
If you do, the update experience will break for customers who already own the product. After a content package has been published to a particular country in RETAIL, all future content updates must be uploaded to the same content package. - When creating a content update, revise the version number inside the package.
This will allow customers to get the update.
To create a content package
- On the Packages page, click Add new package to be taken to the New Package page.
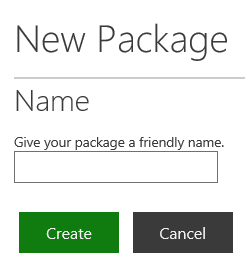
- In the box under Give your package a friendly name, type a name for the package and click Create. Back on the Packages page, you will see your new package displayed in the table.
Change the name of a content package
- On the Packages page, click the name of the content package you want to update.
- In the Package Name box, type a new name for your package and click Save.
Upload files to a content package
You should only have one package per product instance. Otherwise, you’ll break content updates. However, you may have multiple packages per product per instance if it’s a multi-binary SKU. If you are a game developer and need help with this process, contact xdphelp@microsoft.com. If you are an app developer, contact xboxapps@microsoft.com.
Your package must contain both an XVC and an EKB file. DiscLayout.xml is optional; only titles that use intelligent delivery can make use of it.
For information about creating XVC, EKB, and DiscLayout.xml files, see the Xbox One XDK Documentation.
Note When all the files for a product build are uploaded, the content package is not yet available for run-time access in the sandbox. To make it available, you must publish it first.
When uploading binary files to XDP, use the following naming convention:
sandbox-name product-name [- SKU-differentiators ]
Examples
SDBX.1 product Instance -
Game (has 2x SKUs)
(SDBX.1) Contoso Alpine Skiing - NA
(SDBX.1) Contoso Alpine Skiing - EMEA
Durable
(SDBX.1) Cascade Slopes
SDBX.9 product Instance -
Game (has 2x SKUs)
(SDBX.9) Contoso Alpine Skiing - NA
(SDBX.9) Contoso Alpine Skiing - EMEA
Durable
(SDBX.9) Cascade Slopes
To upload files to a content package
- On the Packages page, in the table entry for the content package you want to upload files to, click Upload in the Actions column in the row for Binary. This will open the File Upload pop-up.
Note Make sure your browser allows pop-ups.
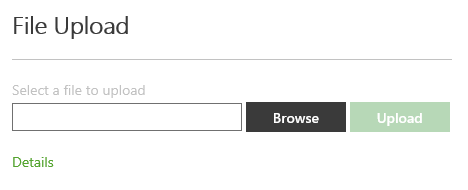
- Browse to locate the XVC file you created, and then click Upload.
- Once the binary is uploaded, you can then upload your EKB file by following the same process, but this time clicking Upload in the row for EKB.
- Finally, if you have a layout file (DiscLayout.xml), you can upload it by clicking Upload in the row for Disc Layout Xml.
For instructions about publishing content packages to a sandbox, see Publish to a Development Sandbox.
Deactivate or reactivate a content package
You can make all the content packages in a product instance unavailable for run-time access in the sandbox by deactivating that product instance; and a product instance that has been deactivated can later be activated again.
To deactivate or activate a product instance
- On the information page for the product, in the table under Product Instances, click the name of the product instance.
- Under Title Data, in the Status row, XDP will show whether the product instance is active or inactive.
If the product instance is active and you wish to deactivate it, click Deactivate.
If the product instance is inactive and you wish to activate it, click Activate.
Locked content packages
Sometimes you may notice that one of your content packages has some red text in the Actions column indicating that the package is “locked.” A package can be manually locked by Microsoft, or automatically locked when going into CERT. If a package is locked, no one can re-upload the binary or EKB until the package is unlocked again. If you are uncertain why your package is locked or believe it is in error, contact your Release Manager.