Marketplace Availability
With Marketplace Availability, you can configure content, pricing, and availabilities for your product in the Xbox Developer Portal (XDP). You can specify which regions get which content, the price in each region, and more.
The Marketplace Availability UI is a replacement of the Catalog & Availability workbook that publishers previously had to fill out and then send to Microsoft. The new UI should be much quicker and easier to use.
Note Before you begin, make sure you have configured the sales regions correctly. If you are configuring for a developer sandbox, you can continue without Microsoft approving your sales region configuration; however, if you are configuring for RETAIL, you must wait for Microsoft to approve your sales region configuration before you can configure Marketplace Availability. For more information about configuring sales regions, see Configure the Sales Regions for a Product.
You must also be sure that you have the appropriate permission to configure Marketplace Availability. To view your permissions, click Manage in the top left, then select Access Management from the drop-down menu. On the right side of the page, click on the Permissions tab. You will see something similar to the following:
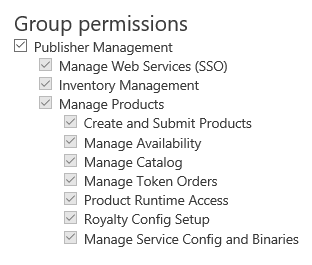
Manage Availability is the permission that allows you to use Marketplace Availability. If its box is checked, you have the permission.
The workflow for configuring Marketplace Availability is shown in the following diagram:

Your configuration starts as a draft, meaning it has not been submitted yet; then you submit your configuration; then, if you are submitting to RETAIL or CERT, you must wait for your configuration to be approved; finally, your configuration is published. If you are publishing to a development sandbox, you don’t have to wait for your configuration to be approved-you can simply self-publish.
To access the Marketplace Availability page, navigate to your product page in the XDP and click Marketplace Availability under Marketplace, or click Marketplace Availability in the navigation menu on the left.
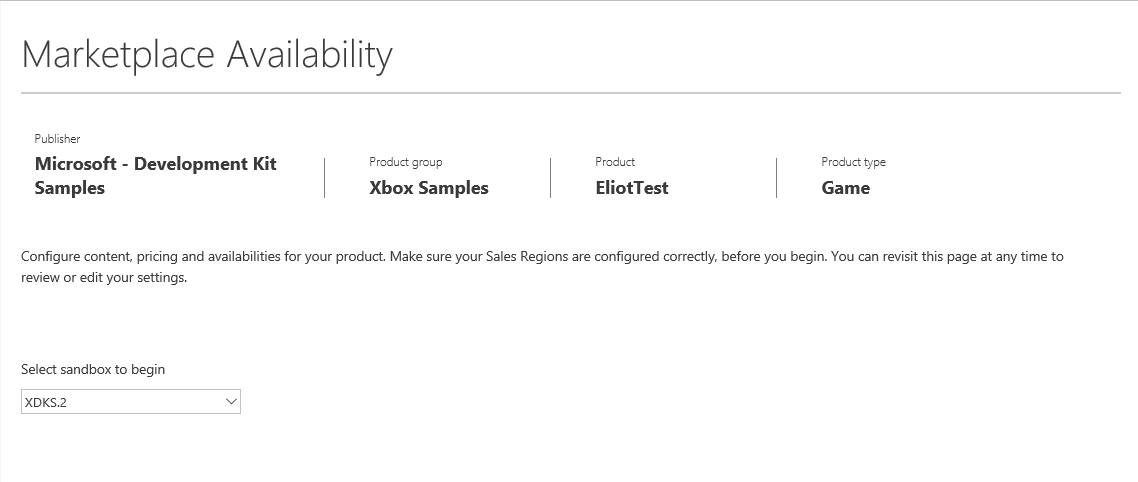
Choose a sandbox from the drop-down menu under Select sandbox to begin.
The following topics describe how to configure Marketplace Availability for your product:
- Section applicability
- Set content
- Set price
- Set dates
- Set quantity
- Set products in a bundle
- Set advanced settings
- Copy settings between products
- Preview and submit changes
Section applicability
The following sections of this document describe the different sections of the Marketplace Availability page. However, not all sections apply to all product types. Refer to the following table to determine which sections apply to your product.
| Section | Game | Game Add-On Durable | Game Add-On Consumable | Game Demo | Bundle (including Season Pass) |
|---|---|---|---|---|---|
| Content | Yes | Yes | Yes | ||
| Price | Yes | Yes | Yes | Yes | |
| Dates-Release | Yes | Yes | Yes | Yes | Yes |
| Dates-Pre-Order | Yes | Yes | Yes | ||
| Dates-Trial | Yes | ||||
| Dates-Visible | Yes | Yes | Yes | Yes | |
| Quantity | Yes | ||||
| Products in this bundle | Yes | ||||
| Advanced Settings | Yes | Yes | Yes | Yes |
Set content
This section describes how to assign your content packages to your sales regions.
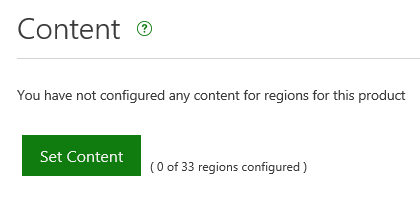
Under Content, XDP will display the number of regions that you have configured for your product. Navigate to the Set Content page by clicking Set Content.
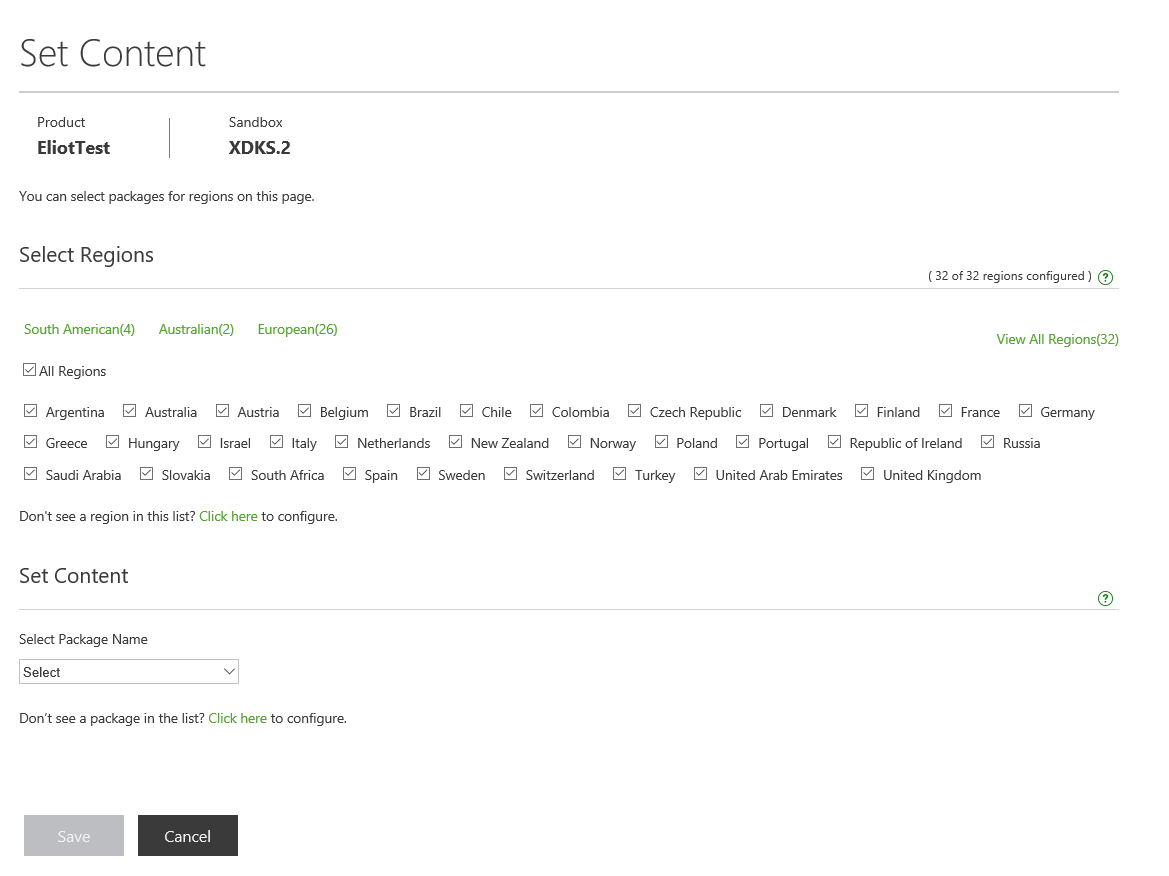
The top of the page shows the product and sandbox that you are configuring.
Under Select Regions, XDP displays the regions that you configured in Sales Region Setup. You can view regions by continent by clicking on the headings-for example, if you configured your product for European regions, you can click European to see only those regions. Alternatively, you can view all of your configured regions by clicking View All Regions on the right. Then, select all the regions that you wish to distribute a certain content package to. If you want to configure your product for more regions, click Click here underneath to be taken to the Sales Region Config page.
Under Set Content, in the drop-down list under Select Package Name, select the content package that you wish to distribute to the selected regions. If you want to create a new content package, click Click here underneath to be taken to the product page. From there, click on the sandbox that you wish to configure from the navigation menu on the left to expand it, and then click Content Packages to be taken to the Packages page. After the new package has been created, navigate back to the Marketplace Availability page by selecting it from the navigation menu, then click Set Content again to go back to the Set Content page.
Click Save to save your configuration, or click Cancel to revert your changes. Either way, you will be taken back to the Marketplace Availability page.
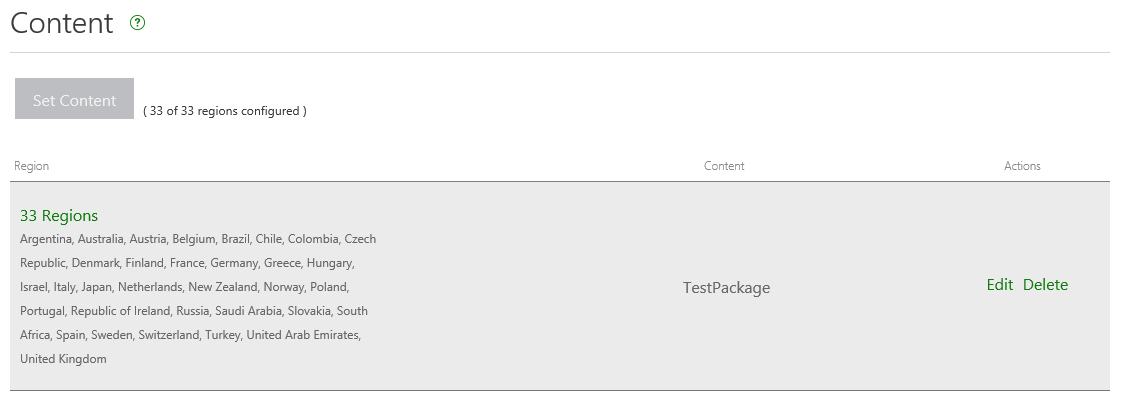
Once you have configured your content, a table will appear on the Marketplace Availability page with the regions you have configured for each content package. To delete a configuration, click Delete in the Actions column. To edit a configuration, click Edit.
Set price
This section describes how to configure wholesale pricing tiers for your sales regions.

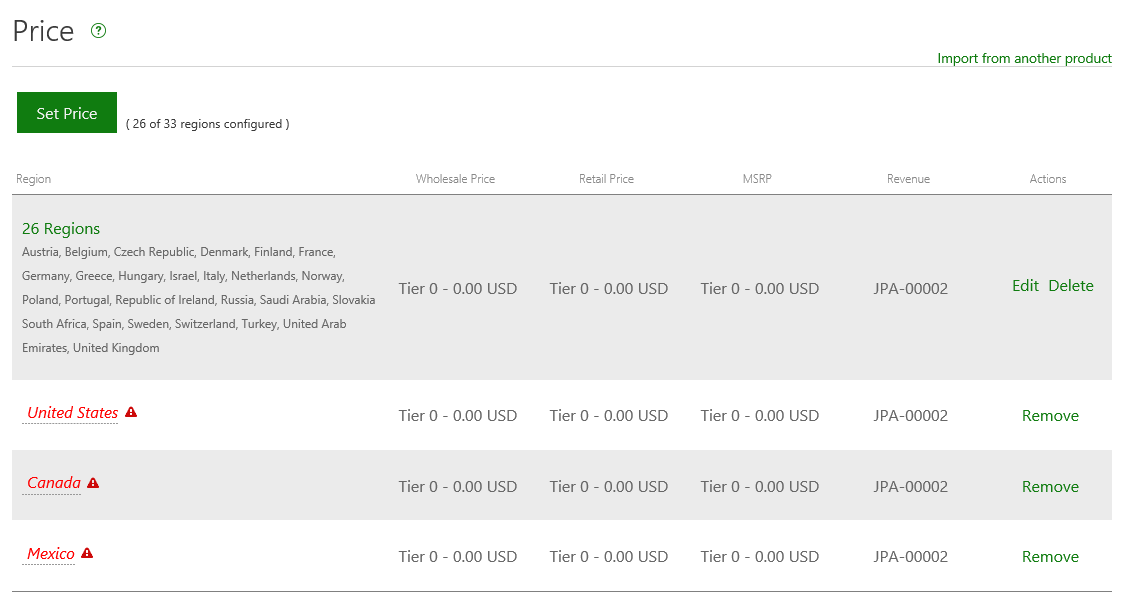
You can either set the price manually by clicking Set Price under Price, or you can import from another product by clicking Import from another product. (To learn more about importing settings, see Copy settings between products.)
XDP will show your Product Type and Sandbox across the top of the page.
Under Select Regions, XDP displays the regions you configured in Sales Region Setup. Select the regions that you would like to set prices for. This works the same way as on the Set Content page.
Under Set Price, you can choose whether you want your product to have a Fixed Price or a Variable Price. A fixed price will always stay the same; a variable price will change price tiers at specified start dates.
Fixed price
If you select Fixed Price, you can set the Wholesale Price Tier by selecting a tier from the drop-down menu. The price tiers are standard, Microsoft-provided tiers. The corresponding MSRP Tier will be shown as well. Each price tier has a local currency equivalent for the regions you have chosen. You can click on the question-mark icon next to the Wholesale Price Tier label to see a table of the regions you have configured, and the local wholesale price for each region.
When you are finished, click Save to save your configuration, or click Cancel to revert your changes.
Variable price
If you select Variable Price, start by choosing the Time zone for the start dates of each price tier change. You can choose whether you want it to be the local time for each region, or the same time zone across all regions.
Next, choose a Wholesale Price Tier from the drop-down list for the first row in the table. The corresponding MSRP Tier will also be displayed. Also, choose a start date and time for this price tier under Start Date. If you want to delete the price tier, click Delete under Actions. To add another price tier, click Add More.
Set dates
This section describes how to configure the dates for the various phases of your product’s release.
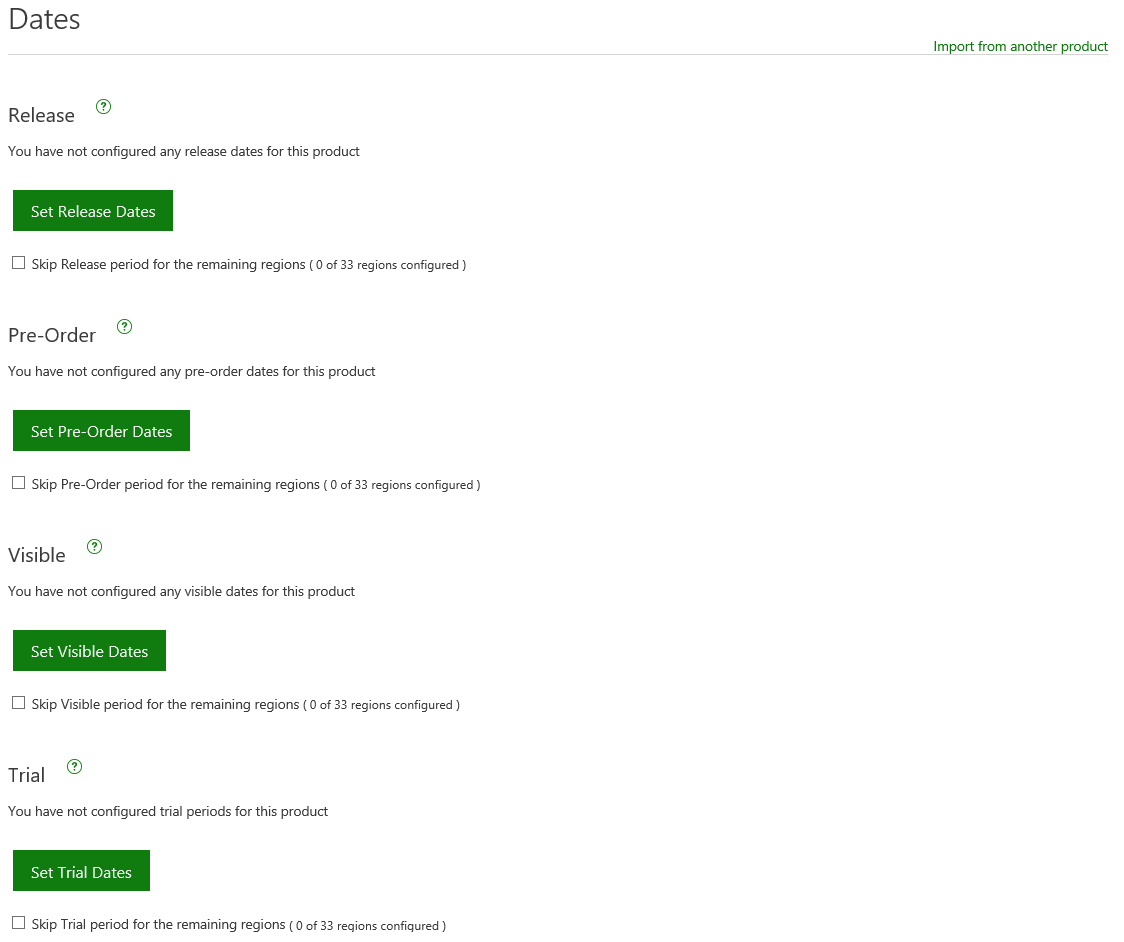
Like with pricing, you can either set custom dates by clicking the buttons under each respective heading, or you can import dates from another product by clicking Import from another product. For details about importing dates, see Copy settings between products.
Set release dates
Click Set Release Dates to be taken to the Set Release Dates page. This is where you configure the dates when the product will be visible and downloadable in the Store.
Under Select Regions, XDP displays the regions you configured in Sales Region Setup. Select the regions that you would like to set release dates for. This works the same way as on the Set Content and Set Price pages.
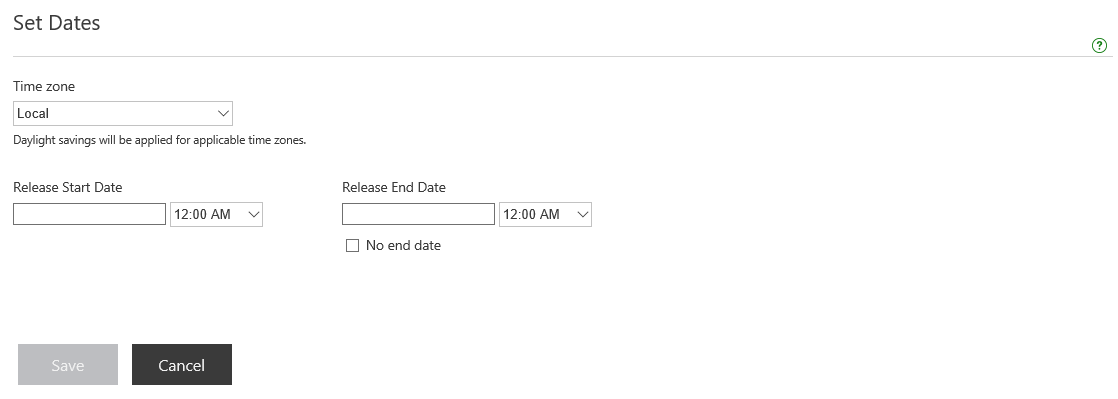
Under Set Dates, you can set the release period for the regions you have selected. Select a time zone from the drop-down list under Time zone. If you want the product to be released at each region’s local time (also known as rolling release), select Local. If you want it to be released at the same time in all regions, select the appropriate time zone.
Select a date and time for the release period to start under Release Start Date, and a date and time for when the product will be taken off the Marketplace under Release End Date. The Release Start Date should match up with the Release Date you set in Sales Region Setup. To have the product remain on the Marketplace indefinitely, check No end date. You can change the end date at a later time.
If you are configuring a product of type Game Add-On Durable or Game Add-On Consumable, you will see an additional option: Hide this product from Marketplace (select if this product is available for in-game purchase only). Like it says, you should only check this box if your product will only be sold in an in-game store and not the Xbox Marketplace.
When you’re finished, click Save to save the configuration, or click Cancel. Either option will take you back to the main Marketplace Availability page.
From there, you can go back and edit the different configurations you’ve made by clicking Edit in the Actions column, or delete configurations by clicking Delete.
You can also choose to skip the release period for the remaining regions that have yet to be configured by checking Skip Release period for the remaining regions. You might want to do this for products such as pre-order bundles that you only want to be available for pre-order.
Set pre-order dates
During a product’s pre-order period, it will be visible and purchasable in the Store, but users will not be able to play it until a specified date.
If you want your product to be available for pre-order, click Set Pre-Order Dates under Pre-Order. You will be taken to the Set Pre-Order Dates page.
As before, select the regions for which you would like to set pre-order dates under Select Regions.
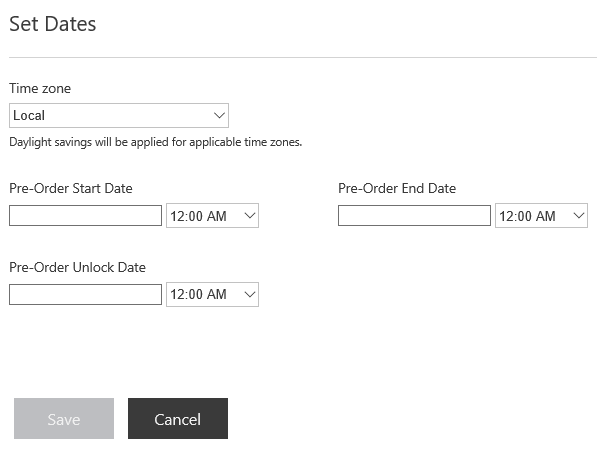
You can set the pre-order start, end, and unlock dates under Set Dates. Select a time zone from the drop-down list under Time zone. If you want the product’s pre-order dates to be at each region’s local time (also known as rolling release), select Local. If you want its pre-order dates to be at the same time in all regions, select the appropriate time zone.
Select dates and times for the Pre-Order Start Date, Pre-Order End Date, and Pre-Order Unlock Date using the respective date and time pickers. If the product has a release period, the Pre-Order End Date should match the Release Start Date-that is, the pre-order and release periods should be contiguous and contain no overlap or gaps. The Pre-Order Unlock Date is the date when your product becomes playable-this should also match the Release Start Date. If the pre-order and release periods are not contiguous, XDP will throw an error when you try to submit your configuration. If the product has no release period, the Pre-Order End Date and Pre-Order Unlock Date can be any dates you choose.
When you’re finished, click Save to save the configuration, or click Cancel. Either option will take you back to the main Marketplace Availability page.
From there, you can go back and edit the different configurations you’ve made by clicking Edit in the Actions column, or delete configurations by clicking Delete.
You can also choose to skip the pre-order period for the remaining regions that have yet to be configured by checking Skip Pre-Order period for the remaining regions.
Set visible dates
You may want to make your product visible in the Marketplace without making it available for pre-order or purchase. In this case, click Set Visible Dates to be taken to the Set Visible Dates page.
As before, select the regions that you would like to set visible dates for under Select Regions.
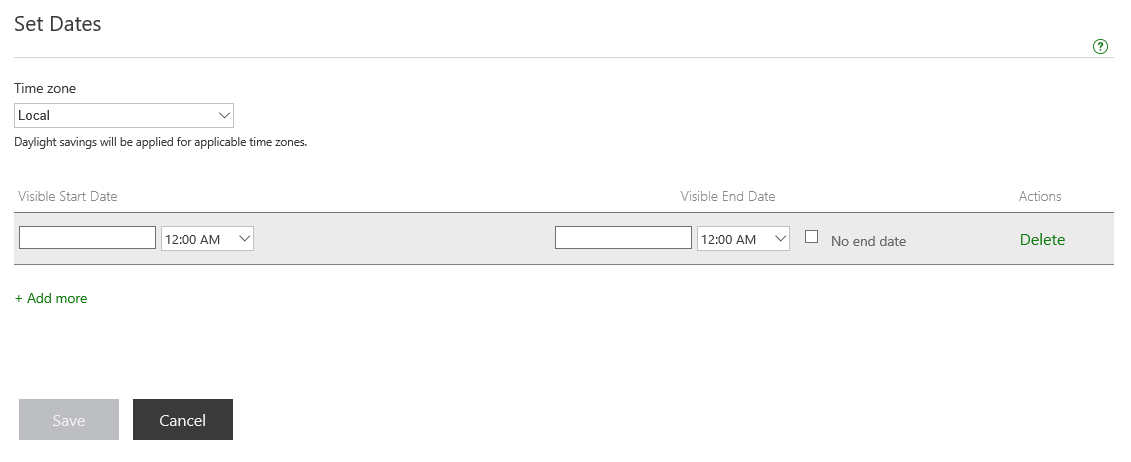
You can set the visible start and end dates under Set Dates. Select a time zone from the drop-down menu under Time zone. If you want the product’s visible dates to be at each region’s local time (also known as rolling release), select Local. If you want its visible dates to be at the same time in all regions, select the appropriate time zone.
Select dates and times for the Visible Start Date and Visible End Date using the respective date and time pickers. The visible period should be contiguous with the pre-order and release periods-that is, the Visible End Date should match the Pre-Order Start Date (or Release Start Date , if there is no pre-order period). If your visible and pre-order periods are not contiguous, XDP will throw an error when you try to submit your configuration.
You can also decide to instead have your product remain visible in the store indefinitely by selecting No end date.
If you want multiple visibility periods, you can click Add more to add another row to the table, and configure another visibility period. As mentioned earlier, you would typically set a visibility period before the pre-order/release period. Just make sure that visibility periods don’t overlap with each other or with pre-order/release periods.
Finally, you can delete a visibility period by clicking Delete in the Actions column.
When you’re finished, click Save to save the configuration, or click Cancel. Either option will take you back to the main Marketplace Availability page.
From there, you can go back and edit the different configurations you’ve made by clicking Edit in the Actions column, or delete configurations by clicking Delete.
You can also choose to skip the visible period for the remaining regions that have yet to be configured by checking Skip Visible period for the remaining regions .
Set trial dates
If your product will have a trial period, you can click Set Trial Dates under Trial to set the dates.
As before, select the regions for which you are setting the trial period under Select Regions.
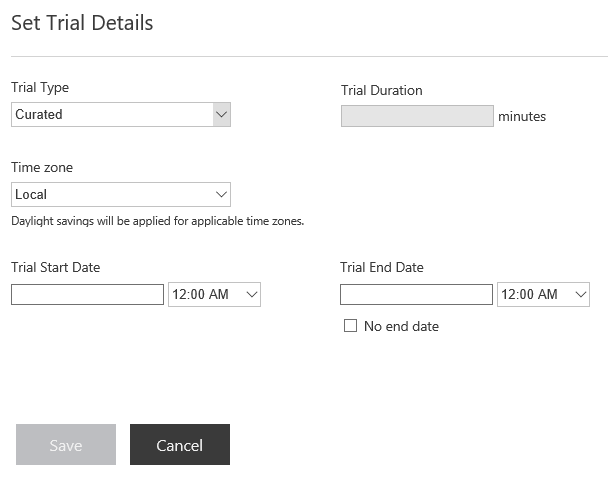
Under Set Trial Details, select the Trial Type from the drop-down menu. If you want to allow users to play your product for an amount of time that you specify, select Timed, and enter the amount of time in the Trial Duration field. You can choose Curated instead if the game developers implement the trial restrictions themselves.
Select a Time Zone from the drop-down menu. If you want the product’s trial dates to be at each region’s local time (also known as rolling release ), select Local. If you want its trial dates to be at the same time in all regions, select the appropriate time zone.
Select dates and times for the Trial Start Date and Trial End Date using the respective date and time pickers. If you want the trial period to last indefinitely, check No end date. The trial period does not have to be contiguous with other periods.
When you’re finished, click Save to save the configuration, or click Cancel. Either option will take you back to the main Marketplace Availability page.
From there, you can go back and edit the different configurations you’ve made by clicking Edit in the Actions column, or delete configurations by clicking Delete.
You can also choose to skip the trial period for the remaining regions that have yet to be configured by checking Skip Trial period for the remaining regions.
Set quantity
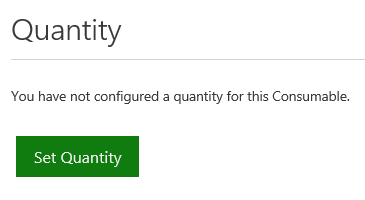
If you are configuring the Marketplace Availability for a product of type Game Add-On Consumable, you can set the quantity of your consumable in the Quantity section. Click Set Quantity to be taken to the Set Quantity page.
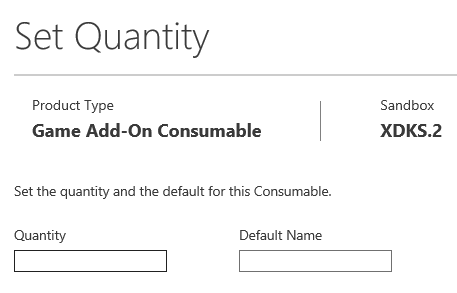
You can set the Quantity and Default Name for the consumable in the respective fields. The Quantity will not be displayed in the Marketplace, but the Default Name will be displayed on the Marketplace page for the consumable. So, for instance, if you want the player to be able to purchase 10 Potions, you will need to enter “10” under Quantity, and “10 Potions” under Default Name.
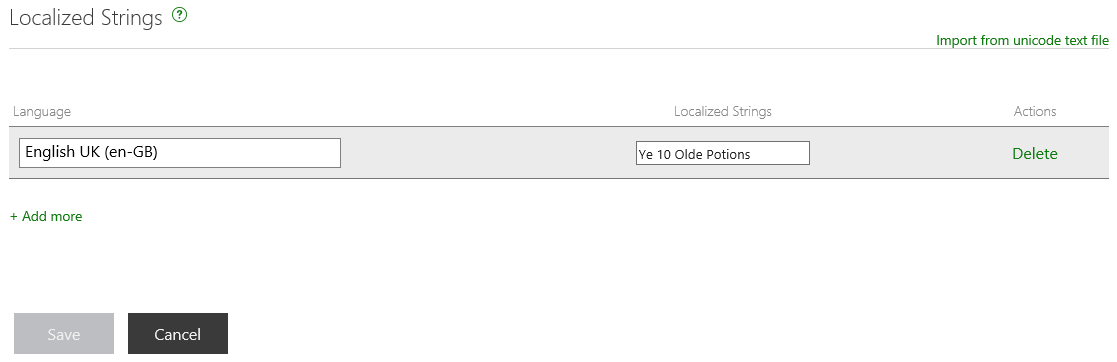
You can also configure Localized Strings for the consumable that will appear as the name in regions with the languages that you select in the Language drop-down menu. You can select more than one language for the same localized string. This will replace the Default Name that you configured above. For regions that you don’t provide a localized string, the name will appear as the Default Name.
To delete a localized string, click Delete in the Actions column.
To add additional localized strings, click Add more.
If you have many localized strings, it may be easier to import them in bulk. To do so, follow the steps below:
Import localized strings in bulk
- Create a Microsoft Excel file of your strings in the following format:
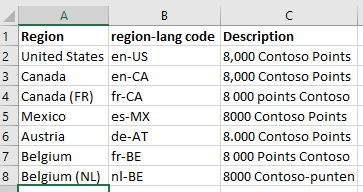
- Save the file as Unicode Text (*.txt).

- On the XDP Marketplace Availability - Set Quantity page, click Import from unicode text file.

- Click the Browse button, then select the .txt file you just saved and click Open.
When you’re finished, click Save to save your changes or Cancel to revert them. Either option will bring you back to the Marketplace Availability page.
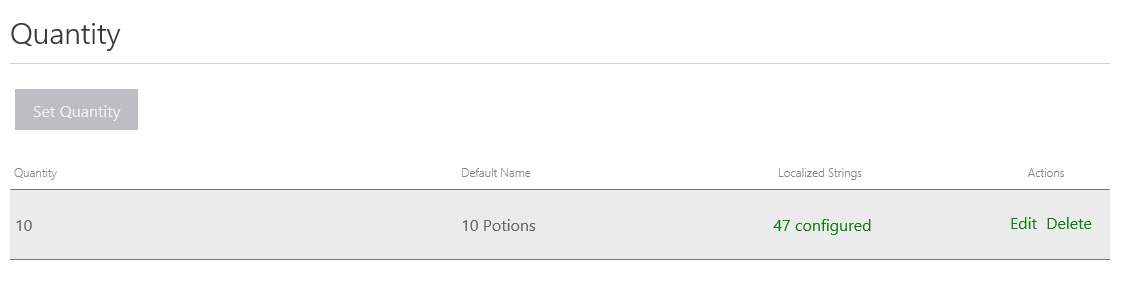
Your configuration will appear under the Quantity heading. You can click the green text in the Localized Strings column or Edit in the Actions column to go back to the Set Quantity page and edit the configuration. You can also click Delete to delete the configuration.
Set products in a bundle

If you are configuring the Marketplace Availability for a product of type Bundle, you can set the products in your bundle by clicking Set Products to be taken to the Edit Bundle page.
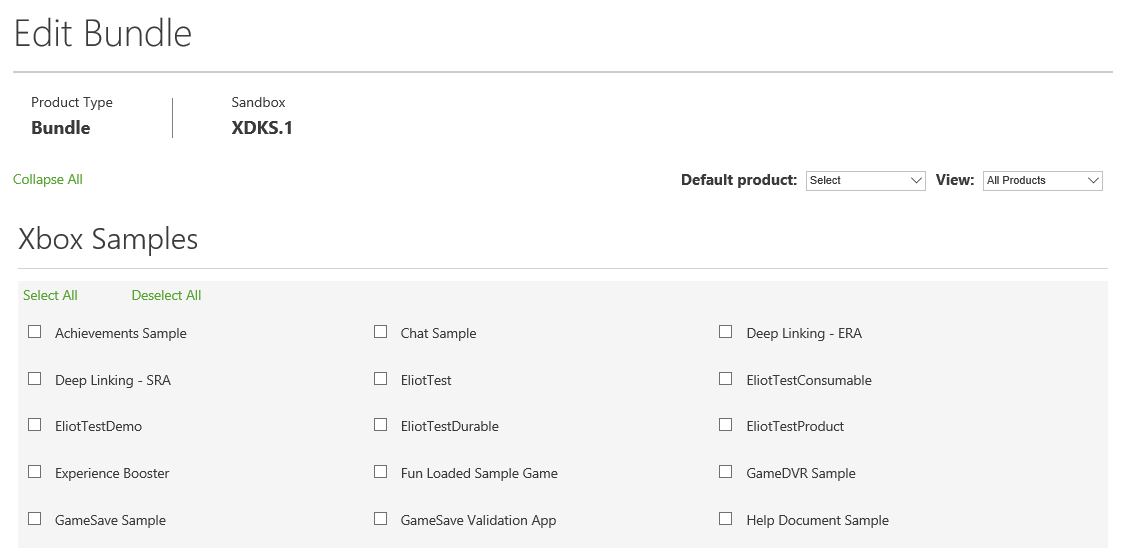
XDP will display all of the product groups for your publisher, and all of the products in each product group. The product group that the bundle is in will be at the top. Select the products that you want your bundle to include. You can Select All or Deselect All of the products in a product group by clicking the respective button.
Set a Default product by selecting it from the drop-down menu. The default product is the larger, poster art box on the store page.
You can also view either All Products or Selected Products by selecting an option from the View drop-down menu.
When you are finished editing your bundle, click Save at the bottom of the page, or click Cancel to revert your changes. You will be taken back to the Marketplace Availability page.

XDP will display how many products are in your bundle and the default product. Click See full list to see all of the products that are included in the bundle, and click Hide full list to hide this list again. You can also view only products of a certain type by selecting that type from the View drop-down menu. If you want to continue editing the products in the bundle, click Set Products again to return to the Edit Bundle page.
Set advanced settings
The Advanced Settings section of the Marketplace Availability UI allows the user to configure features that don’t easily fall into one of the other sections. Currently the only feature that resides here is this flag:
- Do not show this product in the product list for any Bundles or Season Passes outside of the Release, Pre-order and Visible phases.
This flag allows a user to opt out of having visible-only dates added to the product if the product is included in a Bundle that is visible at times that the included product is not. Default Bundle functionality is that all included products will have visible-only periods added to their configuration if they are not visible during all times that the Bundle is. While this is useful in most standard scenarios, there are times when it would not be beneficial to make the included product visible, such as future products included in a Season Pass.
For example, let’s say you want to add DLC to a Season Pass that has already been released (that is, it is currently live in RETAIL, visible and purchasable from the Store). This DLC is scheduled to be released in 3 weeks. If this DLC is added to the Season Pass without checking the box under Advanced Settings, then it will have a visible-only period added to it starting immediately and lasting until its release date, since this is the default Bundle functionality. This removes the ability to stage the product and allow for token testing. However, if the box is checked, the DLC will not be visible in the Bundle until its configured release date, thus allowing for token testing and staging.
The following steps describe how to configure this setting:
- Navigate to the Marketplace Availability page for the product to be included in a bundle (but not inherit visiblity dates).
- Select the appropriate sandbox from the drop-down under Select sandbox to begin.
- Under Advanced Settings, click the Set Advanced Settings button. This will take you to the Advanced Settings page.
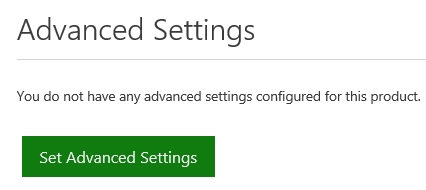
- Under Set Advanced Settings, check the box labeled Do not show this product in the product list for any Bundles or Season Passes outside of the Release, Pre-order and Visible phases.”
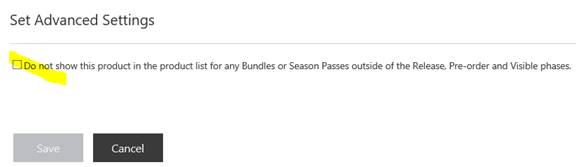
- Click the Save button to save your settings and return to the main Marketplace Availability page.
Copy settings between products
If a product has the same pricing and/or availability configuration as another product in the same product group, you can simply copy the settings from one product to the other, so you don’t have to enter the same information multiple times.
To import price settings from another product, click Import from another product to the right of the Price heading on the Marketplace Availability page; likewise, to import date settings, click Import from another product to the right of the Dates heading. Alternatively, you can click Copy these settings to other products at the bottom of the page to copy settings from the current product to other products. Any of these methods will take you to the Marketplace Availability | Copy Settings page.
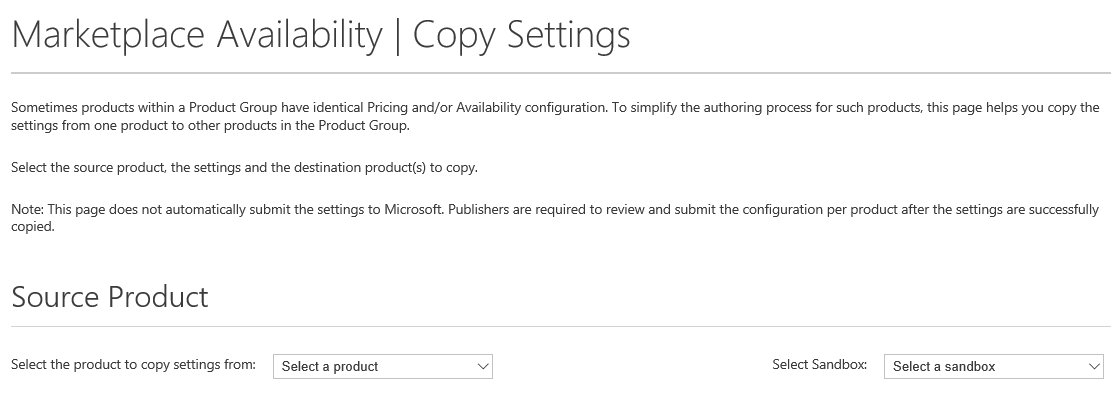
Under Source Product, next to Select the product to copy settings from, open the drop-down list and select the product you wish to import settings from. Then, next to Select Sandbox, open the drop-down list and select the sandbox for the product. If you clicked on Copy these settings to other products on the Marketplace Availability page, these fields will already be selected for you.
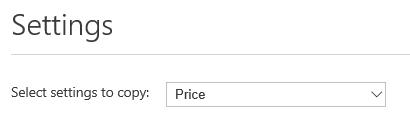
Under Settings, next to Select settings to copy, open the drop-down list and select whether you want to copy the Price & Dates , just the Price, or just the Dates. If you clicked Import from another product next to the Price or Dates heading on the Marketplace Availability page, this field will be pre-selected accordingly.

Under Destination Product, next to Select Sandbox, select the sandbox for the product(s) to which you are copying settings. Then, under the heading labeled with the name of your product group, select the product(s) that you wish to copy settings to. You can Select All or Deselect All by clicking the respective buttons. The product for which you clicked Import from another product will already be selected.
When you are finished, click Copy to copy the settings, or click Cancel.
If the import is successful, you will get a Success message at the top of the screen, and be returned to the main Marketplace Availability page.
Preview and submit changes
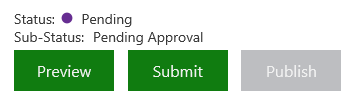
At the bottom of the page, the Status of your Marketplace Availability configuration will be displayed. The following table shows the different states that your configuration can be in:
| Status | Meaning |
|---|---|
| Not Submitted | Changes are in draft. |
| Pending | Changes have been saved and submitted. |
| Approved | Changes have been reviewed and approved. |
| Rejected | Changes have been reviewed and rejected. |
Additionally, the Sub-Status will give you more specific information about where in the configuration process you are.
When you are finished configuring Marketplace Availability for your product, you can click Preview at the bottom of the Marketplace Availability page to preview the changes you have made. This will open a page with a table that groups the configurations by regions with identical availability settings.
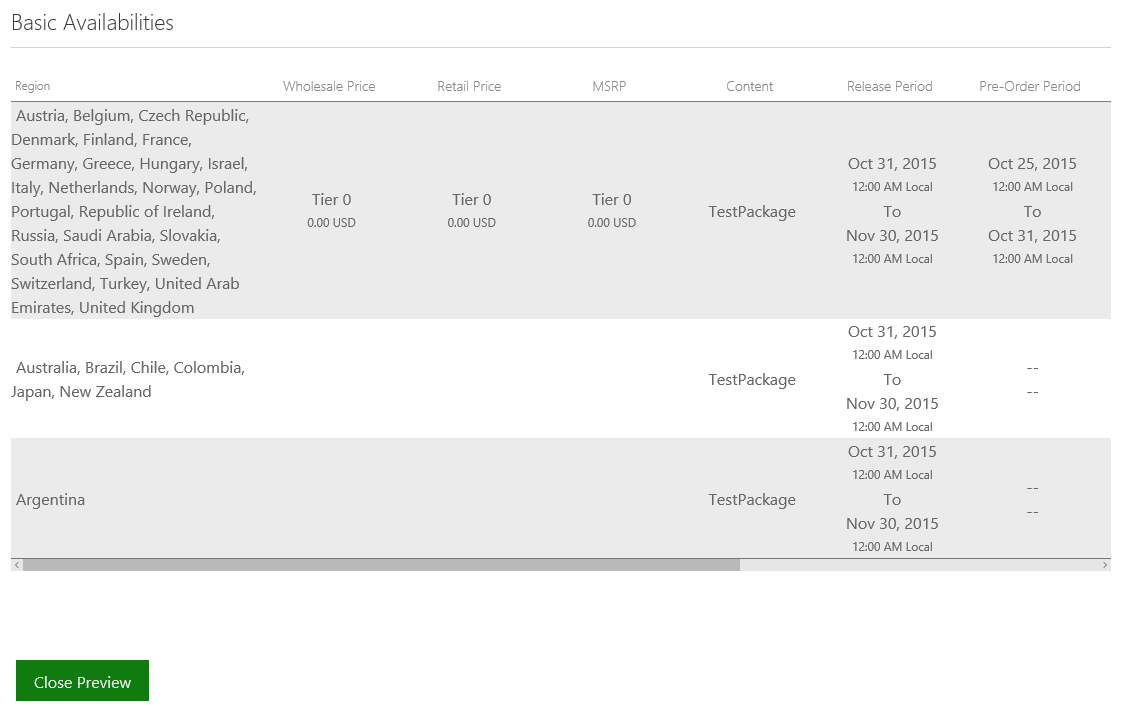
Scroll through the table and make sure the configurations are to your liking, then click Close Preview to close the tab or window and return to the Marketplace Availability page.
If you are satisfied with your configuration, you can submit it for approval by clicking Submit.
XDP will display a message saying that all regions for your product will be configured for token redemption starting today, but visibility in the Xbox Marketplace will be limited to the availability phases that you configured. Click OK.
Wait a bit for XDP to submit the configuration, and if it is successful, a Success message will appear at the top of the screen. Click Dismiss to refresh the page.
Approval Dashboard
The status indicator is handy for when you want to check the status of a single product, but what if you want to see the statuses of multiple products on the same page? That’s what the Approval Dashboard is for: it allows you to see the statuses of all your products in one view so you can quickly determine which products have been approved, which are still pending, etc.
To get to the Approval Dashboard, click Manage in the top left to open the drop-down menu, then click Approval Dashboard. From there, you can see the statuses of your products’ marketplace availability submissions by clicking the Availability tab.
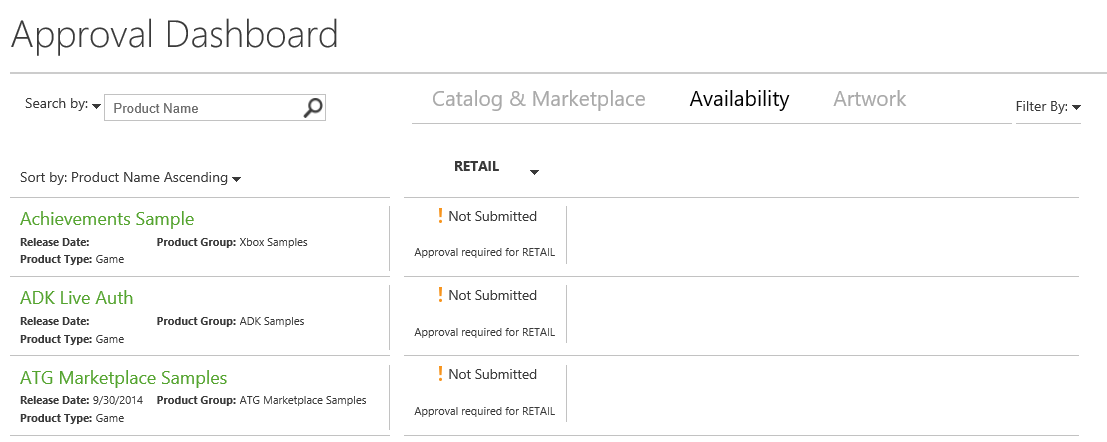
If you are looking for the status of a particular product, you can search for it in the search box. You can search by Product Name, Product Group, Product ID, or Title ID by clicking the arrow next to Search by and selecting the respective option from the drop-down menu. You can also sort the list of products by Product Name, Release Date, or Product Type, in either Ascending or Descending order, by clicking the arrow next to Sort by and selecting the appropriate option from the drop-down.
You can also sort products by their approval status for RETAIL by clicking the arrow in the RETAIL column and selecting either Submitted: Ascending or Submitted: Descending from the drop-down. Finally, you can filter products by Pending, Approved, Rejected, and Not Submitted by clicking the arrow next to Filter by and selecting the respective option from the drop-down. Clear the filter by selecting Clear Filter .
If you want to edit the availability configuration of a particular product, click the entry in the product’s RETAIL column to jump to its Marketplace Availability page.
Publish Marketplace Availability
In order to see your product live in the Marketplace, you must publish the Marketplace Availabilities to the RETAIL sandbox. You can submit your Marketplace Availability configurations for approval to any sandbox, but you can only self-publish to development sandboxes. To publish to RETAIL or CERT, you must wait for Microsoft to approve and publish for you.
You can publish your configurations by clicking Publish at the bottom of the page after you have submitted your configurations. This will take you back to the main product page. You may already be familiar with the publishing process, described in Publish to a Development Sandbox, but this process is described here as well for completeness:
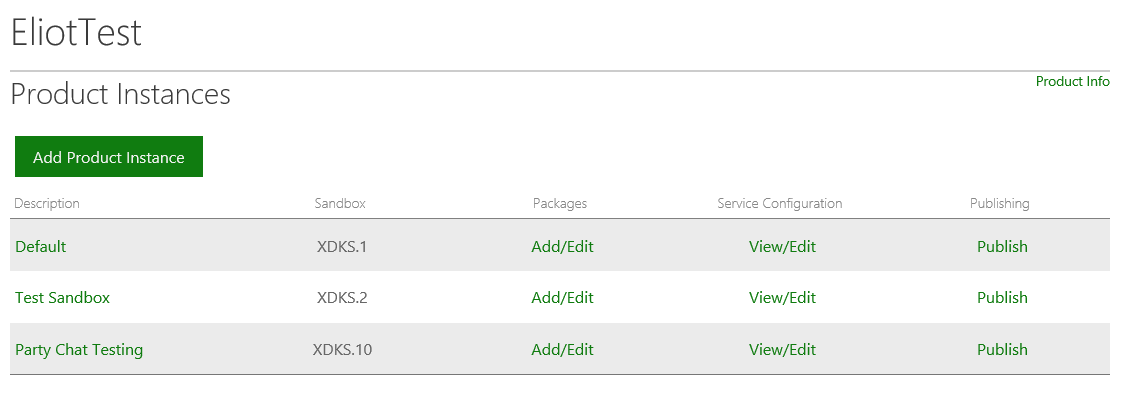
- In the Product Instances table, locate the row for the product instance that you wish to publish and click Publish in the Publishing column. This will take you to the Publishing Approval page.
Note Make sure to select the product instance in the sandbox that you configured Marketplace Availability for.
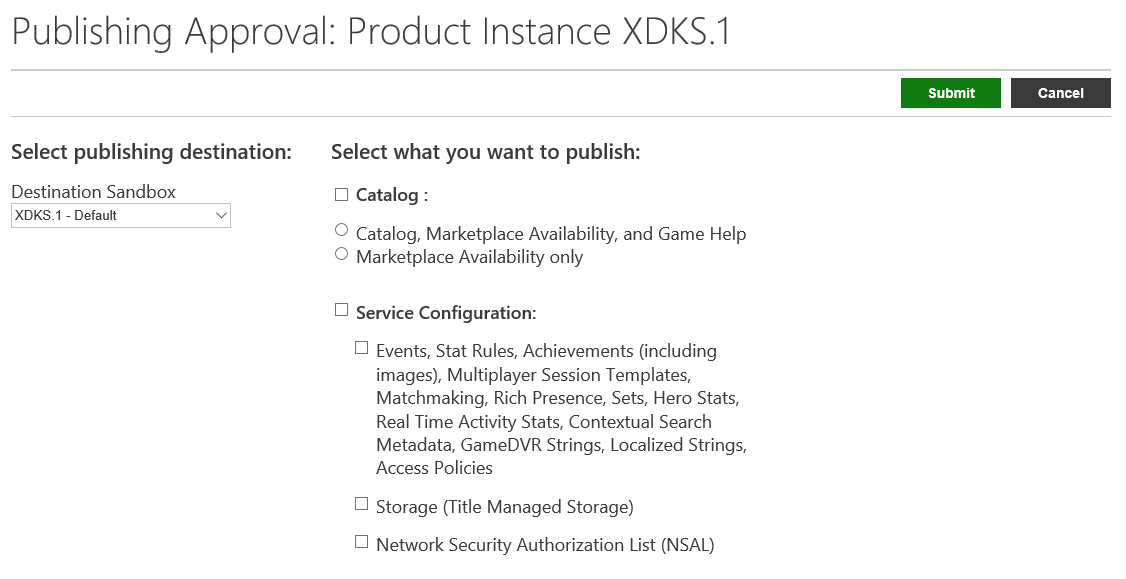
- In the Destination Sandbox drop-down menu, select the sandbox that you wish to publish to.
Note Make sure you select the same sandbox that you configured Marketplace Availability for. - In the Select what you want to publish section, select the items that you want to publish. Make sure to select Catalog and one of its two options in order to publish your availability configuration. Note that you must have previously published a catalog listing to the sandbox before you can publish Marketplace Availability only.
- Click Submit. XDP will take you to the Confirm Publish page.
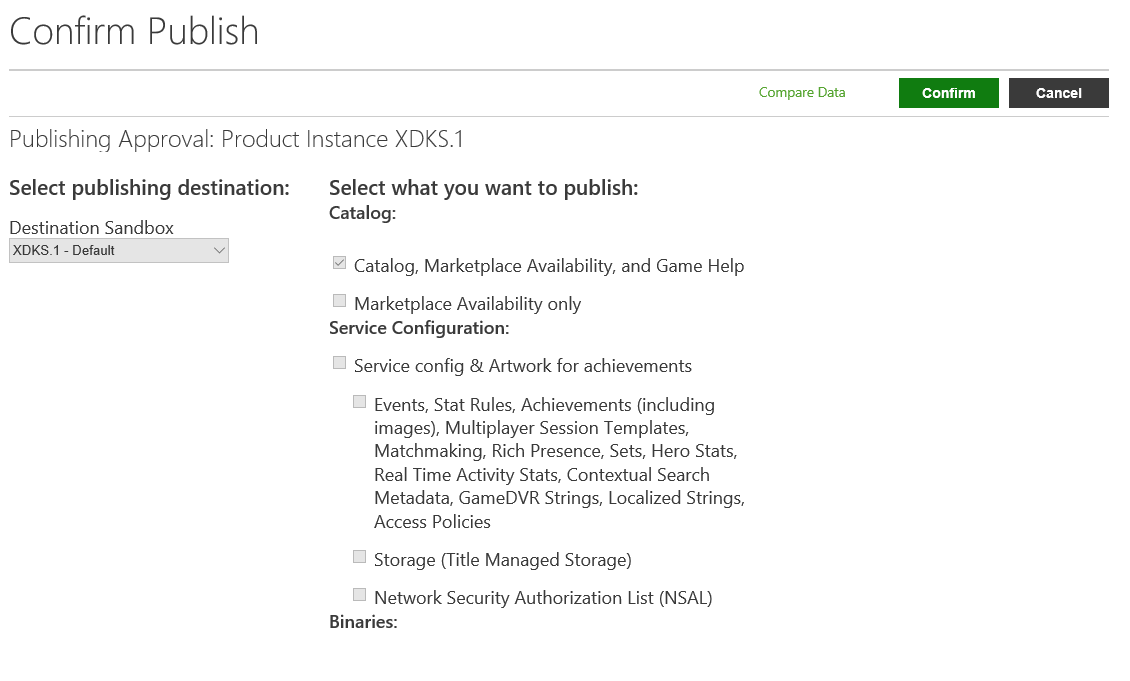
- Click Compare Data. The Compare Data page will open in a new tab or window.
- Select the sandboxes and their sections that you want to compare, and then click Compare. XDP will default to showing you the draft of the changes in the sandbox that you are about to publish to on the left side, and what is already published in the sandbox on the right.
- Review the results of each line item. You may see the following items:
- A circle with an arrow pointing to the left. This indicates that the item exists only in the product instance for the sandbox on the left.
- A circle with an arrow pointing to the right. This indicates that the item exists only in the product instance for the sandbox on the right.
- A circle with a not equal sign. This indicates that the item exists in both sandboxes, but doesn’t match. Additional details regarding the mismatch are provided.
- When you are finished reviewing the results, close the tab or window.
- Back on the Confirm Publish page, click Confirm.
- XDP will take you back to the product’s main page. You can view the status of the product instance publish by expanding the arrow in the Status column.